Token Auth with JWTs Part 3 - Security and UX - React + Context

This is part 3 in a series of tutorials about authentication. If you haven't already, get some additional context by going through the other parts:
- Authentication Basics
- Token Auth with JWTs Part 1 - Server Setup
- Token Auth with JWTs Part 2 - React + Context
Set up
Assuming you are in the branch for part 2, you will need to checkout the beginning spot for part 3. It starts exactly at the finishing spot for part 2, but just in case your code is slightly different from ours, it's best to start over fresh with our beginning copy of part 3:
# Add and commit your code if you've been typing along
git add -A
git commit -m '<your message>'

# Whether you've been typing along or not, follow these steps:
git checkout part-3-react-auth-beginning

# cd into the "client" folder
npm install

# Just in case, cd back into the project's root folder
npm install

# Run the server
nodemon index.js

# In separate terminal window, run the react app from the client folder
cd client && npm start
Hashing passwords
Our database is saving raw passwords. This is simply never a good idea. Fortunately it's fairly easy to include some proven encryption methods to save only "hashed" (or encrypted) passwords to the database, then have our server decrypt them when it checks for password equality on login.
Install bcrypt
bcrypt is a package that hashes passwords and checks hashed passwords.
# cd into your project root folder first (NOT inside the client folder)
npm install bcrypt
Add a "pre save" hook to userSchema
We're going to add code to our models/user.js file that hashes the given password right before saving it to the database. First we'll require bcrypt, then we'll add a "pre-save" hook to the schema. The entire file should look like this:
...
const bcrypt = require("bcrypt");

const userSchema = new Schema({
    ...
});

// It's critical that you don't convert this to an arrow function
// Otherwise it won't use the correct instance of `this`
userSchema.pre("save", function (next) {
    const user = this;
    if (!user.isModified("password")) return next();
    bcrypt.hash(user.password, 10, (err, hash) => {
        if (err) return next(err);
        user.password = hash;
        next();
    });
});

module.exports = mongoose.model("User", userSchema);
Before doing this step, your user in the database looked something like this:
{
    "_id": ObjectId('567080e1bedf163525bf9fb2'),
    "username": "bob",
    "password": "bob",
    "admin": false,
    "__v": 0
}
Now when you create a new user from your ReactJS client or Postman, your user should look like this:
{
    ...
    "password": "$2a$10$KvC5C0tPk7xW4ltrmS0orOC24rrbFprke7Cq0vdRfOEnIsxJxTdPK",
    ...
}
Add a password checking method to your user schema
If you tried to log in with a user whose password was hashed (any user you created since finishing the last step) right now, you would never be able to authenticate with your original password. As it stands, our login route is checking if what the user entered in the password form field is equal to the password stored in the database. But we just hashed the password, so instead we need to let bcrypt compare the entered login password with the one stored in the database so it can accurately assess if it's a match.
We can add our own methods to the user schema so that any user document created is able to run that method. Add the following below the pre save hook we just wrote:
// Again, do not change these function declarations to arrow functions!
userSchema.methods.checkPassword = function(passwordAttempt, callback) {
    bcrypt.compare(passwordAttempt, this.password, (err, isMatch) => {
        if (err) return callback(err);
        callback(null, isMatch);
    });
};
Use our new password checking method inside routes/auth.js
Now instead of checking the incoming password (plain text) against the hashed password in the database, we can delegate the checking to bcrypt, which can decode the stored password and see if the incoming password matches correctly.
authRouter.post("/login", (req, res) => {
    User.findOne({ username: req.body.username.toLowerCase() }, (err, user) => {
        if (err) return res.status(500).send(err);
        if (!user) {
            return res.status(403).send({success: false, err: "Username or password are incorrect"})
        }
        user.checkPassword(req.body.password, (err, match) => {
            if (err) return res.status(500).send(err);
            if (!match) return res.status(401).send({ success: false, message: "Username or password are incorrect" });
            const token = jwt.sign(user.withoutPassword(), process.env.SECRET);
            return res.send({ token: token, user: user.withoutPassword(), success: true })
        });
    });
})
It simply uses the bcrypt.compare() method to check if what was entered by the user is equal to the original password before it was hashed. If it is, match is true, and we go ahead and create the token to send to the user.
Deleting the user's password before sending to the client
Even though we're hashing the password before saving it to the database, this is really only most helpful in the case of a database breach. The passwords gained by the hacker will be hashed and become very difficult and time-consuming to decrypt. However, if you ever need to send the user their own information, like if you want to include a "Profile" page where they can edit their info, we'll be even safer if we don't even send the hashed password as part of the user's profile at all.
We can add another method to our userSchema that returns a modified version of the user object without a password included. (You can add other properties you don't want being sent here as well.)
In models/user.js just above the final module.exports line, add the following:
// Don't change to an arrow function
userSchema.methods.withoutPassword = function () {
    const user = this.toObject();
    delete user.password;
    return user;
};
Back in the authRouter.js file, we need to use this new .withoutPassword() method whenever we're sending the user object in the response.
In all places it says user.toObject(), replace it with user.withoutPassword(). There should be 4 of them to change.
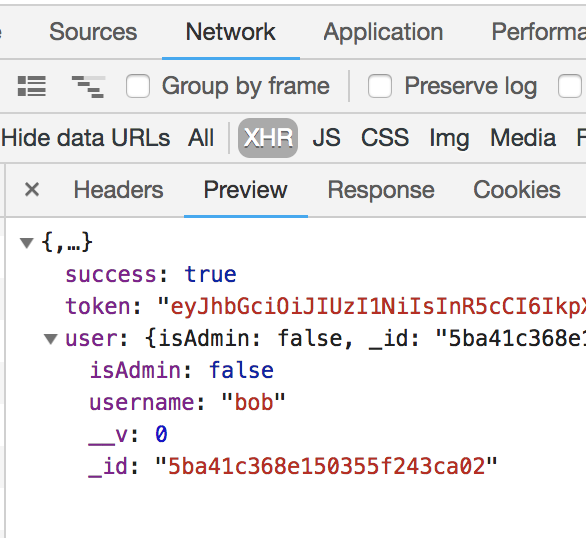
Now when we log in, this is the data that is received by the client:

No password included!
There are a lot of important security measures you can include in your application, and we've only touched on the very surface of all the precautions you can take. Data security is an entire career of its own, so we won't be diving into it here, but if you're interested, there are lots of free resources out there to read up on and use for practice.
For now, let's turn the improving the user experience of the frontend app.
User experience improvements
So far, a user technically can securely signup, login, and add todos that are only available to them. However, their experience on our app is pretty clunky.
Handling Errors
This tutorial doesn't go into form validation (the user shouldn't be able to submit an empty field for username or password, e.g., which should be handled somewhere on the client), but we can at least inform the user if their submitted credentials are invalid (/auth/login) or if they're trying to sign up with a username that's already been taken (/auth/signup).
Since AppContext is forwarding the promises from its methods, any component that uses these methods can handle errors on their own with a .catch after calling it.
For quick reference, the signup and login methods look like this in their entirety:
signup = (userInfo) => {
    return todoAxios.post("/auth/signup", userInfo)
        .then(response => {
            const { user, token } = response.data
            localStorage.setItem("token", token);
            localStorage.setItem("user", JSON.stringify(user));
            this.setState({
                user,
                token
            });
            return response;
        })
}

login = (credentials) => {
    return todoAxios.post("/auth/login", credentials)
        .then(response => {
            const { token, user } = response.data;
            localStorage.setItem("token", token)
            localStorage.setItem("user", JSON.stringify(user))
            this.setState({
                user,
                token
            });
            this.getTodos();
            return response;
        })
}
Another, more modern solution would be change these functions to use the
async/awaitsyntax. However, under the hood it would be doing essentially what we have above
Let's update the consumers of these functions (the Login and Signup components) to chain their own .catch. If there's an error, we'll save the error's message in the local state of these components so we can display it to the user. We'll also make sure to clear the errorMessage when we clear the inputs as well, so our message doesn't stick around forever.
src/Auth/Signup.js
...
constructor() {
    super();
    this.state = {
        username: "",
        password: "",
        errorMessage: ""
    }
}

...

clearInputs = () => {
    this.setState({
        username: "",
        password: "",
        errorMessage: ""
    })
}

handleSubmit = (e) => {
    e.preventDefault();
    this.props.signup(this.state)
        .then(() => this.clearInputs())
        .catch(err => {
            this.setState({errorMessage: err.data})
        })
}

...

render() {
    return (
        <div className="form-wrapper">
            <form onSubmit={this.handleSubmit}>
                ...
            </form>

            {
                this.state.errorMessage &&
                <p style={{color: "red"}}>{this.state.errorMessage}</p>
            }

        </div>
    )
}
We can do exactly the same thing in the Login component (clearly this isn't DRY, and these are the reasons 3rd party libraries like Formik exist). For now, go ahead and repeat the steps above for the Login component.
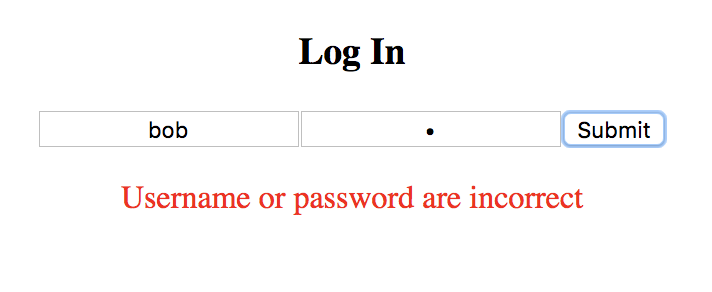
Go ahead and test your Signup and Login routes now! For signup, try signing up with a username you've already used. For login, try entering an incorrect password. You should see something like this:


Even with very little styling, it's already much better than before!
Conditional Views
Navbar
It's pretty common to only show the "Login" and "Signup" options in the navbar if the user isn't logged in, and the "Logout" option if they are. In our app, they also shouldn't be able to see the "Todos" link if they're not logged in too, since they need to be logged in to see their list of todos. Currently, the user sees every link in the navbar no matter what.
A quick and easy way to fix this is to realize that if our user has a token in state, they can be considered "logged in". If there is no token in state, they are "logged out".
Our Navbar component is already receiving the global Context. We can use the token property to determine which parts of the Navbar should be accessible. Here's an update to Navbar.js:
function Navbar(props) {
    return (
        <nav className="navbar-wrapper">

            {
                !props.token ?
                    <React.Fragment>
                        <div className="nav-link">
                            <Link to="/signup">Sign Up</Link>
                        </div>

                        <div className="nav-link">
                            <Link to="/login">Log In</Link>
                        </div>

                    </React.Fragment>
                :
                    <React.Fragment>
                        <div className="nav-link">
                            <Link to="/todos">Todos</Link>
                        </div>

                        <div className="nav-link">
                            <Link to="/profile">Profile</Link>
                        </div>

                        <div className="nav-link">
                            <button onClick={() => props.logout()}>Logout</button>
                        </div>
                    </React.Fragment>
            }
        </nav>
    )
}
We moved the items around a bit so we could group together the correct ones for display. We also switched to using React Fragments so we didn't haven't to wrap them in another div and mess up our styles from the navbar-wrapper class.
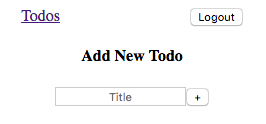
Go ahead and try logging in and out. Your Navbar should be changing!
Signed out view

Signed in view

Protected Routes
As it stands, a user could still enter /todos in the route of the URL bar at the top and load the Todos page. But since they're not authenticated, they won't see any todos on the page, and the Add Todo Form will just throw unauthenticated errors.
Additionally, if a user was logged in but then logged out, they'd still be on their todos page looking at a blank, unusable app.
Let's make it so we protect the Todos route, only allowing someone who is authenticated to get there, and redirecting anyone who isn't signed in to the /login route.
We'll do this by following these steps:
- Create a new
ProtectedRoutecomponent, which will have the same props as the regularRoute ProtectedRoutewill connect to the Context to see if the current user is logged in (if they have a token in the global state)- If they're not authenticated,
ProtectedRoutewill useRedirectfromreact-router-domto navigate the user to the/loginroute - Change the
RoutetoProtectedRouteinside theSwitchin ourAppcomponent.
Let's start!
Create ProtectedRoute
Since this component deals with authenticated users, let's add it in the Auth folder (src/Auth/ProtectedRoute.js):
import React from "react"
import { Route, Redirect } from "react-router-dom";
import { withContext } from "../AppContext"

function ProtectedRoute(props) {
    const { component: Component, ...rest } = props;
    return (
        props.token ?
            <Route {...rest} component={Component} /> :
            <Redirect to="/login" />
    )
}

export default withContext(ProtectedRoute);
We connect to the context so we can check for a token in the global state. We pull the component and all the rest of the props passed into our ProtectedRoute so we can mimic the API of the Route component.
If there's a token, we render the Route per normal. If there isn't, we use Redirect to send them to the login page.
Update the App to use ProtectedRoute
In App.js, change the Route that leads to the TodoList component to use ProtectedRoute instead. Since we mimicked the API, we can just change the name of the Route component:
...
import ProtectedRoute from "./Auth/ProtectedRoute";
...
<ProtectedRoute path="/todos" component={TodoList}/>
...
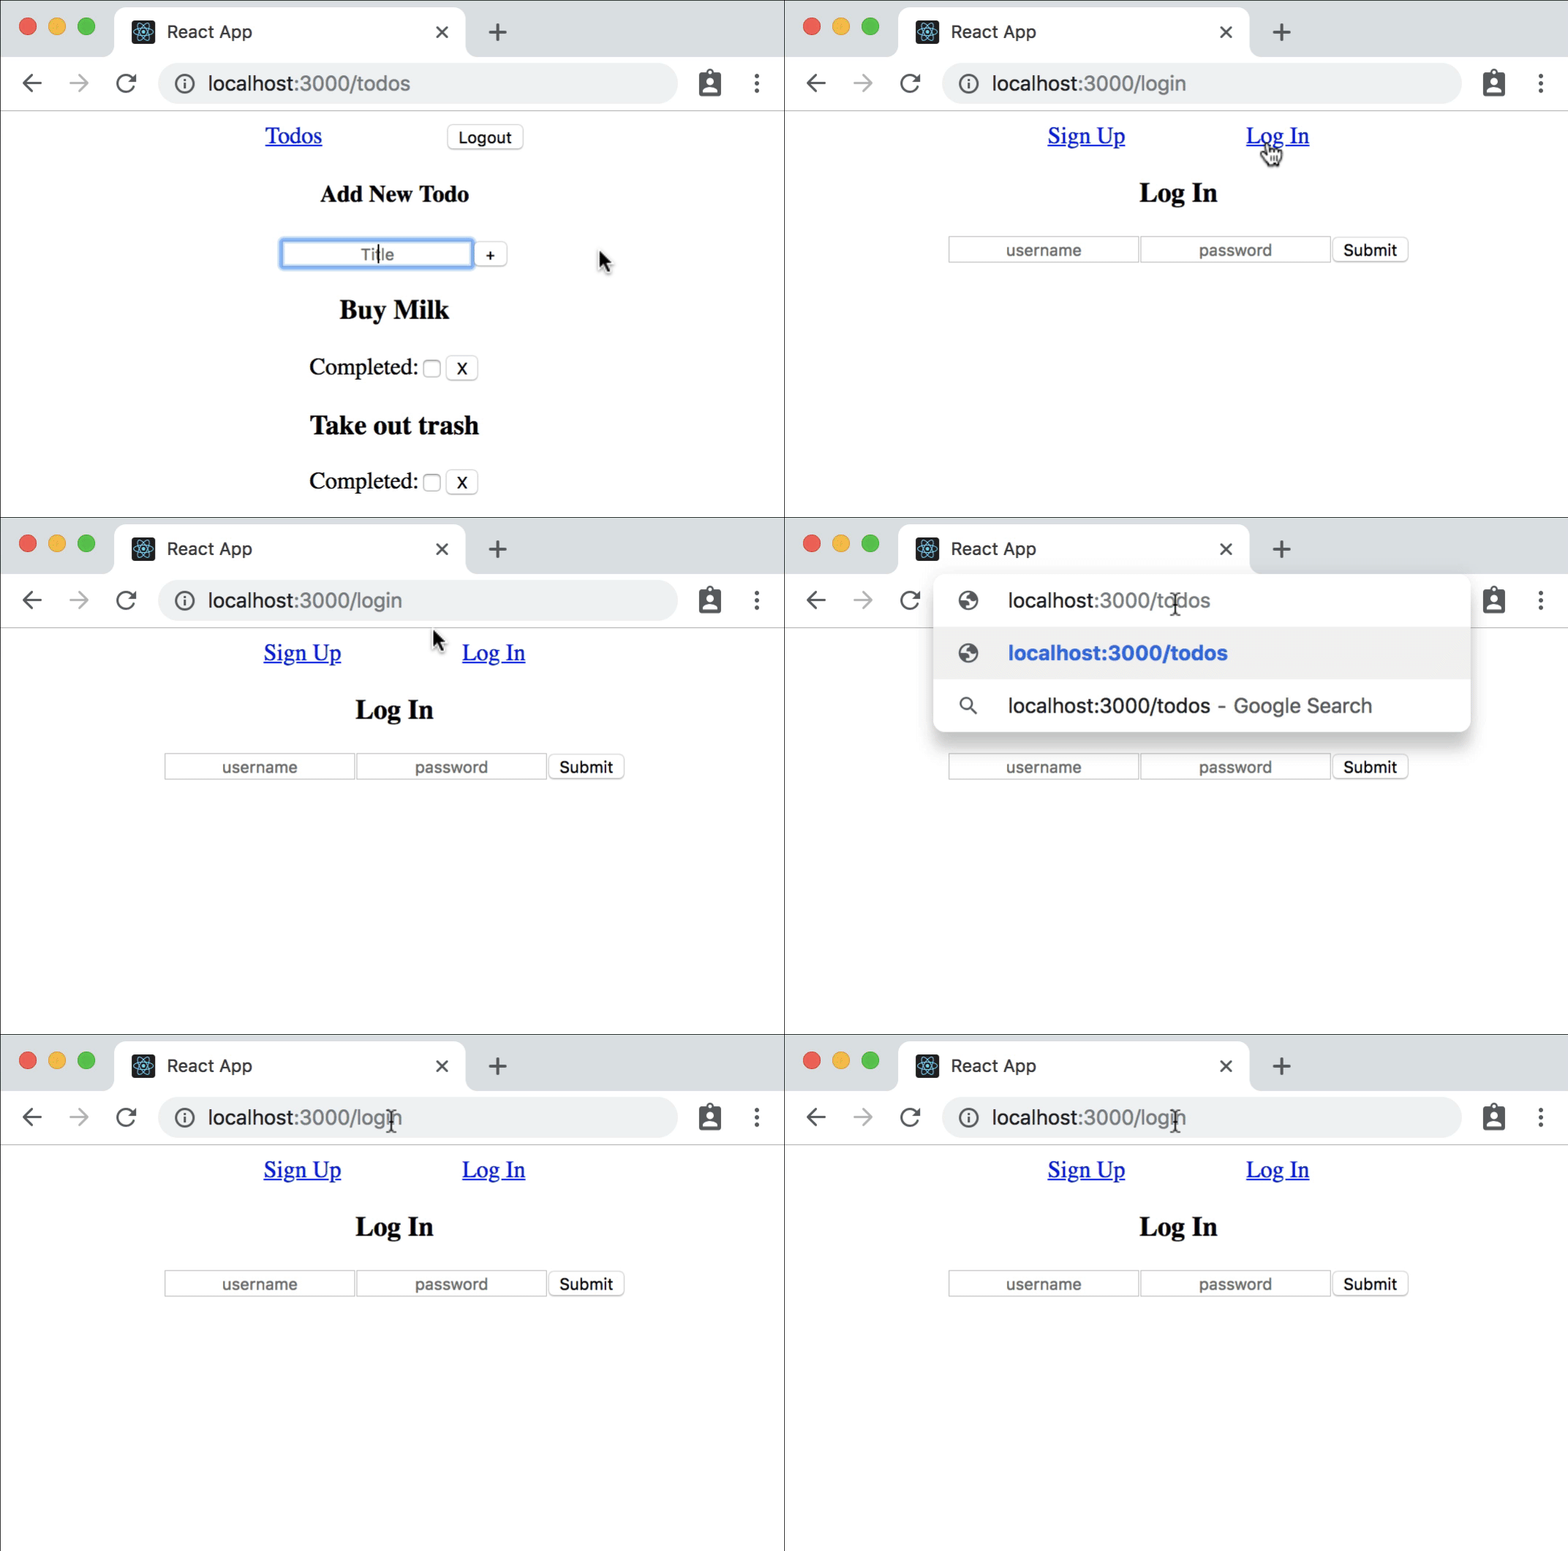
Now even if an unauthenticated user types /todos in the URL bar or a user logs out, they'll be redirected to the login page! Log out and try it for yourself.

It's still a little jarring, but it's much better than it was!
Conclusion
Congratulations! You made it! You have the necessary tools to make a basic token authentication system in React. From here you can try to add on more security features such as email verification, password reset, and a profile view to see/edit your user profile!
