Token Auth with JWTs Part 2 - React + Context

This is part 2 of a multi-part series on setting up user authentication in a MERN-stack application using JSON Web Tokens. If you haven't been following along, please visit the other posts for a full understanding of the current project:
Once you've gone through those, you should check out the part-2-react-auth-beginning branch to start from the same place we'll be starting from for this tutorial. To do that:
# Add and commit your code if you've been typing along
git add -A
git commit -m '<your message>'

# Whether you've been typing along or not, follow these steps:
git checkout part-2-react-auth-beginning

# cd into the "client" folder
npm install

# Just in case, cd back into the project's root folder
npm install

# Run the server
nodemon index.js

# In separate terminal window, run the react app from the client folder
cd client && npm start
Again, spend some time looking around the React code to make sure you understand everything before moving on. This tutorial assumes you've spent some serious time building apps in React before and are familiar with React's Context API.
Here are some things to note about the starter code:
- We're using React's native Context API to store to app-level data like the list of todos. This is also where we'll include authentication information as well. See the section below for a deeper introspection into these parts of the React app.
- In an app this small (there's fewer than 10 components total) you probably wouldn't actually need to even use Context. But since most V School students using this tutorial are building apps that are larger than this todo app, we're using Context for illustrative purposes.
- Please don't turn to Context every single time you're building an app just because you learned it before. Know when to use it and when to avoid it.
- We've added a
"proxy"line to the client'spackage.jsonso that all outgoing HTTP requests will be proxied to port 5000. This way we can avoid any CORS issues.- If you make a change to this
proxy(like if you chose to run your server on a port other than 5000), you'll need to manually stop and start your React dev server. Otherwise the change won't take effect.
- If you make a change to this
Parts of the app using Context
AppContext.jsis where we create the Context instance. We're exporting an HOC that is used to augment components with the context consumer. We're also wrapping the Provider in a component (AppContext) that holds state and a number of methods to use for modifying that state. (addTodo,deleteTodo, etc.). These values (state) and methods are being passed down to the Provider'svaluefor use in the child function where it is being consumed.- The methods are returning promises, so any consumer of these methods will need to handle resolved and rejected promises on their own with
.thenand.catch.
- The methods are returning promises, so any consumer of these methods will need to handle resolved and rejected promises on their own with
- In
index.js, we're wrapping our entire app in the<AppContextProvider>component - In
TodoList.jswe're using thewithContextHOC to turn theTodoListcomponent into a consumer of the context. This is how it has access to the context's functions likeaddTodoand the array oftodos.- Make sure to check out
Todo.jsas well to fully understand how the Provider's methods are being called from theTodocomponents themselves.
- Make sure to check out
Goal
Building off the todo app from part 1, we'll be adding the ability for users to sign up, login, logout, and add/remove their own todos.
First we'll go over how to write new methods that will allow a user to login, sign up, and logout.
The process goes something like this:
- Make a POST request containing user's login credentials.
- If the credentials are valid, the server will send a token and information about the user. We already built this functionality in part 1 of this series.
- Store token in local storage and (limited) user information in the global Context state.
- Send token with all outgoing requests in an HTTP header called
Authorization. - If the user logs out, remove the token and user info from local storage and the global Context state.
Getting Started
Our project contains a simple navbar and several views. Currently, our login and signup forms don't actually do anything except alert us with the info we just entered.


The todos pages don't show us much. Since we haven't implemented a way to send a token to the routes we protected in express, we will get an authorization error if we try to view or add todos.

Signing Up
Right now we only have state and methods for updating the todos array, so let's write some for authentication.
Teach the Context how to sign someone up
In the AppContext component, we need to update our initial state and write a class method that makes a POST request to our /auth/signup API endpoint containing our user credentials (chosen username and password):
// AppContext.js

...
// Notice the new state properties `user` and `token`
// because we spread the state down in the provider,
// we won't need to add these there.
// (They're automatically included)
constructor() {
    super()
    this.state = {
        todos: [],
        user: {},
        token: ""
    }
}

...
// `userInfo` will be an object with `username` and `password` fields
signup = (userInfo) => {
    return axios.post("/auth/signup", userInfo)
        .then(response => {
            const { user, token } = response.data
            this.setState({
                user,
                token
            });
            // forward the response, just in case
            // it's needed down the promise chain
            return response;
        })
}
With this method written, we can now pass it down through the Provider. Inside the render method:
// Still inside AppContext.js

...

render() {
    return (
        <AppContext.Provider
            value={{
                ...
                signup: this.signup,  // add this to the value object
                ...
            }}
        >
            {this.props.children}
        </AppContext.Provider>
    )
}
Teach the signup form how to call the context method
Open your Signup component (/src/Auth/Signup.js)
First of all, let's wrap the Signup component with the context consumer using our HOC at the very bottom of the file:
...

import { withContext } from "../AppContext"

...

export default withContext(Signup);
Then, now that the component has access to the methods/state on context, let's update the handleSubmit method to use the signup method on context (instead of the alert). Remember that the AppContext's signup method was forwarding (returning) a promise, so we can chain another .then when we call it.
After a successful login, we'll redirect the user to their todos using history.push() from React Router
...

handleSubmit = (e) => {
    e.preventDefault();
    this.props.signup(this.state)
        .then(() => this.props.history.push("/todos"))
}

...
Note that the above is an imperative way to redirect the user. If they manually type
/loginin the URL, they'll come back to the login page despite already having logged in. For the sake of simplicity, we'll leave it the way it is. But be thinking about ways you might improve this experience further in your future apps.
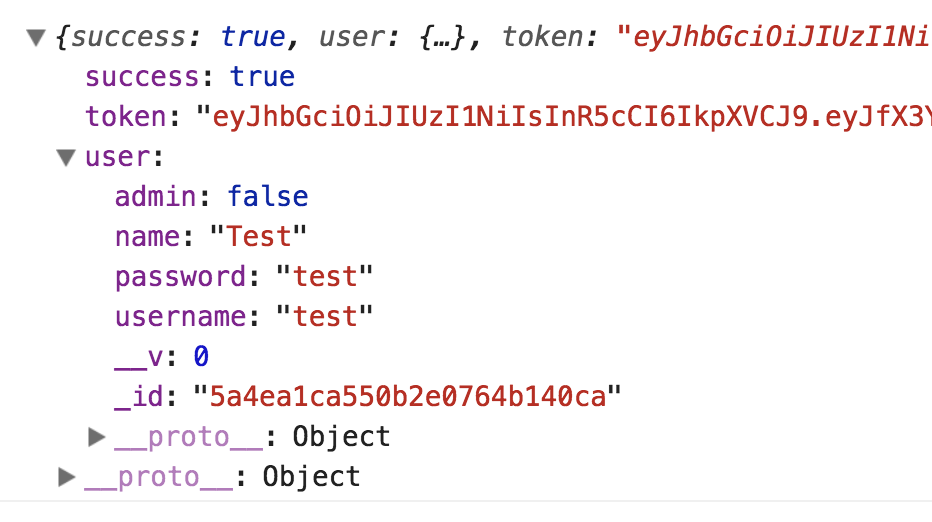
If you sign up a new user (make sure to use a different username than the one you used when testing this endpoint in Postman from the previous section of this tutorial) you should be able to see your user info, a token, and a success property in your console:
Once again, it's bad to store and transmit plain text passwords. We're going to remedy this in part 3 of this series, so make sure to complete that section after this one!
Next, let's store the token and user's information in localStorage so that even if our app refreshes we don't lose that information.
Back in your AppContext component in the signup method, store the token and user from the response data in localStorage:
...
.then(response => {
    const { user, token } = response.data
    localStorage.setItem("token", token);
    localStorage.setItem("user", JSON.stringify(user));
    this.setState({
        user,
        token
    });
    return response;
})
...
If you sign up now, look under Application in your dev tools and click on Local Storage. you should see something like this:

Now when you sign up, a new user is created in the database and the token and user's info is stored in localStorage and the global context! However...
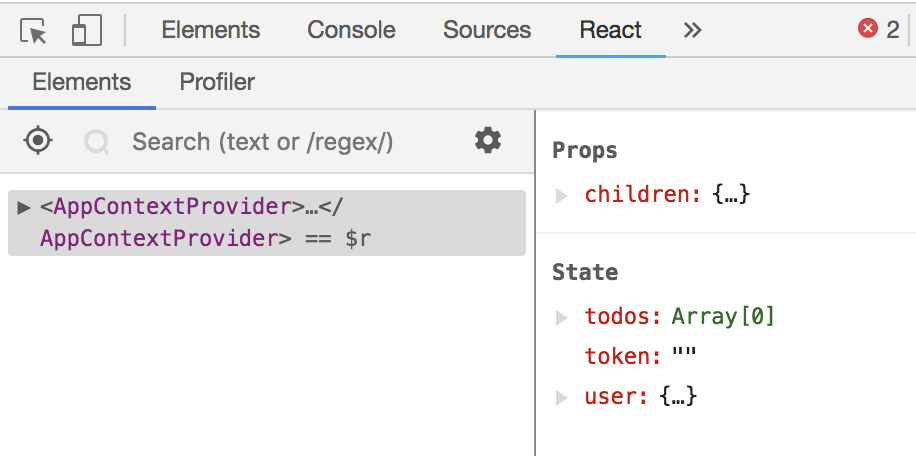
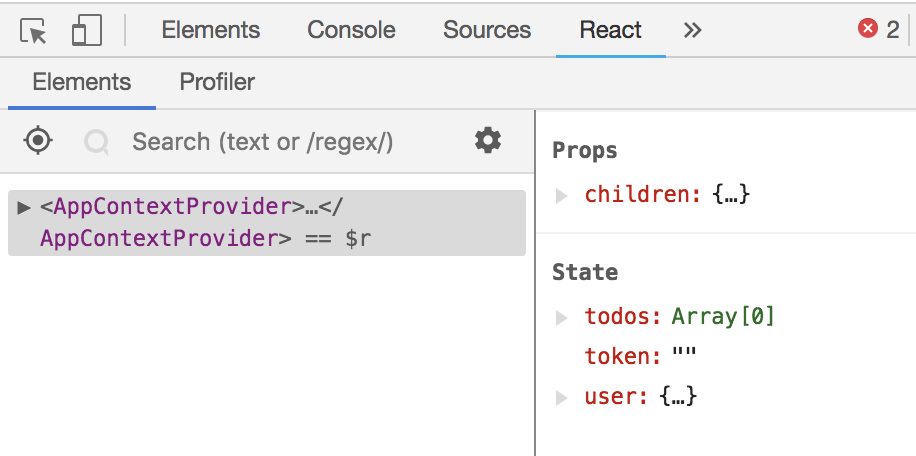
When you refresh the page, that information (the user and token) should still be in localStorage, but are missing from the context! That's because when the app loads, it initializes the local state.token to an empty string and state.user to an empty object. React Chrome Dev Tools confirms this:
We can fix that easily by adding some code in the constructor of AppContext that checks localStorage first before setting them to the empty values:
...
constructor() {
    super()
    this.state = {
        todos: [],
        user: JSON.parse(localStorage.getItem("user")) || {},
        token: localStorage.getItem("token") || ""
    }
}
...
Now when you refresh, your data should stay in the context.
Logging In
There is little substantial difference between logging in and signing up. To better focus on the authentication part of this tutorial, we'll be using a totally separate Login component, but it should be noted that you should DRY this code up a bit more. Using render props, you could turn the separated Signup and Login components into a single component. After everything in authentication makes sense, we recommend going back and making these kinds of improvements for practice.
But for now, here's a quick overview of how to add the login feature to your app:
Create login function in AppContext.js and pass it down the context provider.
...

login = (credentials) => {
    return axios.post("/auth/login", credentials)
        .then(response => {
            const { token, user } = response.data;
            localStorage.setItem("token", token)
            localStorage.setItem("user", JSON.stringify(user))
            this.setState({
                user,
                token
            });

            // Don't forget to get this newly-logged-in user's todos!
            this.getTodos();
            return response;
        })
}

...

<AppContext.Provider
    value={{
        ...
        login: this.login,
        ...
    }}
>

...
(This isn't very DRY, so don't be afraid to try and find ways to DRY this code up on your own!)
Use withContext to connect the Login component and use the login method in your handleSubmit.
...
import { withContext } from "../AppContext"

...

handleSubmit = (e) => {
    e.preventDefault();
    this.props.login(this.state)
        .then(() => this.props.history.push("/todos"))
}

...

export default withContext(LoginForm);
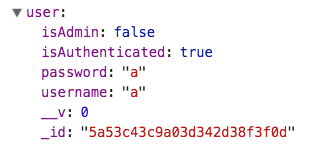
Now you should be able to successfully sign in! If you want to double check, add a console.log to your login method. Remember, "signing in" simply means you received (and stored) a token from the server to use in authenticating yourself as a legit user to the server.

Logging Out
"Logging out" is as simple as removing the authorization token and user info from localStorage and the context state. The only "logout" button exists in the navbar, so we'll take the following steps:
- Create a
logoutmethod in theAppContextto remove the token and user fromlocalStorageand reset those properties in the state - Remove the array of todos while we're at it (since logging out means you shouldn't have access to those anymore).
- Pass the logout method down the provider
- Connect the
NavbarusingwithContext - Call the
logoutmethod when clicking the logout button
Let's do it!
// AppContext.js

...

logout = () => {
    localStorage.removeItem("user");
    localStorage.removeItem("token");
    this.setState({
        todos: [],
        user: {},
        token: ""
    })
}

...

<AppContext.Provider
    value={{
        ...
        logout: this.logout,
        ...
    }}
>

...
First 3 done already! Let's go over to the Navbar to finish up.
// Navbar.js

...
import { withContext } from "./AppContext";
...

// Don't forget to add `props` to your Navbar component
function Navbar(props) {
    ...

    <button onClick={props.logout}>Logout</button>

    ...
}

export default withContext(Navbar);
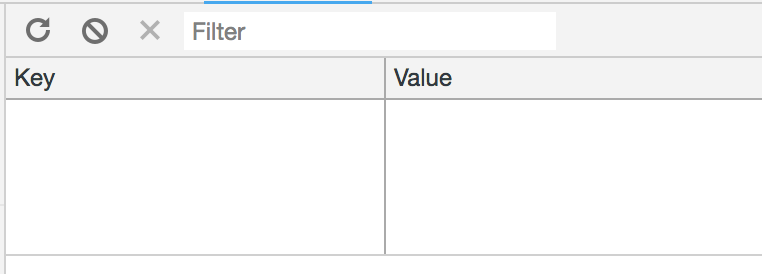
Now when you click the "Logout" button, the token and user info disappears from localStorage and the context state!
Protect your routes
Now that you can sign up, sign in, and logout, it's time to protect the routes that an unauthenticated user shouldn't be able to get to, such as the list of todos.
Recap
So far we are able to:
- Create a new account, login with an existing account, and logout.
- Store the token and user info in the context state and
localStorage. - Load the authorization token and user info from
localStorageinto the context state so everything still works when the page is refreshed.
What are we missing?
- We cannot view or add to our todo list. (We get a
401 (Unauthorized)error from the server) - All our nav links are visible despite our login status. (Todos and Logout should be hidden if we're not logged in and vice versa for the Login and Signup links)
- We are not redirected to a new page after we signup/login/logout.
Interceptors
We receive an authorization error when we attempt to view or add todos because there is no token present in our GET/POST request header when we send it. Remember from part 1 that express-jwt is protecting all routes that begin with /api, so if there isn't a valid JWT present in an HTTP header called Authorization, it will send back the 401 (Unauthorized) error.
If you recall from part 1 we simply placed the token into the headers via Postman. It looked like this:
 .
.
Fortunately, axios makes it very easy to attach information to request headers using what are called interceptors. An interceptor is simply a way to "intercept" incoming and outgoing HTTP requests so we can do something to the request before it gets sent (outgoing) or right after it is received (incoming).
In our case, we can pause an outgoing request, add the Authorization header to that request, and then let it continue on its way to the server. We'll just want to retrieve the token from localStorage so we can set the header correctly.
However, before we add the interceptor, it's sometimes helpful to create a separate instance of axios. Otherwise, you may end up adding the header to requests you make elsewhere (like a 3rd-party API) that may cause conflicts. (Maybe the 3rd-party API also requires an Authorization header with a different value).
Head to the AppContext component and add the following code to the top of the file.
import axios from "axios";
const todoAxios = axios.create();

todoAxios.interceptors.request.use((config)=>{
    const token = localStorage.getItem("token");
    config.headers.Authorization = `Bearer ${token}`;
    return config;
})
Then replace all instances of axios with todoAxios in the methods of AppContext.
If you want to know more about interceptors in axios, check out the docs.
Test it out!
Try logging in and adding a todo!
Review
All the business logic is happening in the AppContext. Anytime we needed to add functionality or state that affected various, disparate parts of your site, we added that functionality to the context.
Then, any component that needed access to the data or methods from the context, we wrapped them with the HOC withContext and had access to the properties via props.
As we've mentioned a number of times, there are some gaping security flaws and poor UX in our app. Head to part 3 to continue onward!
