Setting up MongoDB Compass

MongoDB Compass is a great GUI tool for inspecting and interacting with the data in your MongoDB database. It's free, and easy to set up.
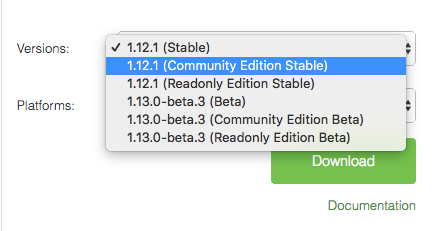
- Go to the download page for MongoDB Compass, choose "Community Edition Stable" from the dropdown menu, and click "Download"

-
Open the .dmg and follow the instructions (drag the MongoDB Compass Community app into the Applications folder)
-
Open MongoDB Compass Community from the Applications folder and agree to the license agreement. Feel free to follow through the small tutorial they provide.
-
When you get to the "Connect to Host" page, fill in the following pieces of information:
Hostname: localhost
Port: 27017
Favorite Name: Local MongoDB
(Everything else you can skip for now)
- Click "Save Favorite", then "Connect"
You should now be able to see a list of the databases you have created on your machine so far. Clicking in to one will show the list of collections in the database. Clicking the name of the collection will open you to a view where you can see all the documents in that collection.
Hovering over the documents, you'll be able to see a small menu on the right, where you can Edit, Copy, Clone, or Delete any given document.
Feel free to play around in MongoDB Compass and see all the cool stuff you can do!
