JavaScript and jQuery

This tutorial will cover how to do things in JavaScript and jQuery. We will first go through how to do something with JavaScript, then show how to do the same thing with jQuery.
Why would we use jQuery or JavaScript?
JavaScript is, frankly, what makes websites cool. It allows a user to interact with your website and allows your website to "interact" back with the user. Where HTML simply describes the content of your page (and should do nothing else) and the CSS describes how your website should look (and should do nothing else), your JavaScript describes how your website should act depending on the actions the user makes.
By now you should know about CSS selectors - the tools we use to select HTML objects (also called nodes) so that we can style the exact things on the page we want styled, no more, no less.
JavaScript
How do we reference HTML objects in our JavaScript? There are a few ways. First, you'll have to set up an empty HTML project, including an external stylesheet and an external JavaScript file. Add a tag/object to manipulate. For now, we'll just add a <p> tag with an id of cool-tag.
<!DOCTYPE html>
<html>
    <head>
        <link rel="stylesheet" href="styles.css">
    </head>
    <body>
        <p id='cool-tag'> cool tag </p>
        <script src="app.js"></script>
    </body>
</html>
Accessing an HTML element in pure JavaScript
In your JavaScript file you can access any HTML element by selecting its id attribute you assigned to it like this:
document.getElementById('cool-tag');
You can save the reference to that selected element by saving it in a variable:
var pTag = document.getElementById('cool-tag');
Now when the time comes to make changes to your cool-tag element, you won't have to keep selecting it over and over. Instead, you can just use the variable name you assigned to the selector.
Notice the use of "camelCase" in JavaScript (doItLikeThis) and hyphens for CSS and HTML (do-it-like-this). Since JavaScript can perform mathematic operations, such as 8 - 2, we can't use hyphens to separate anything in JavaScript because it will think we are trying to subtract things.
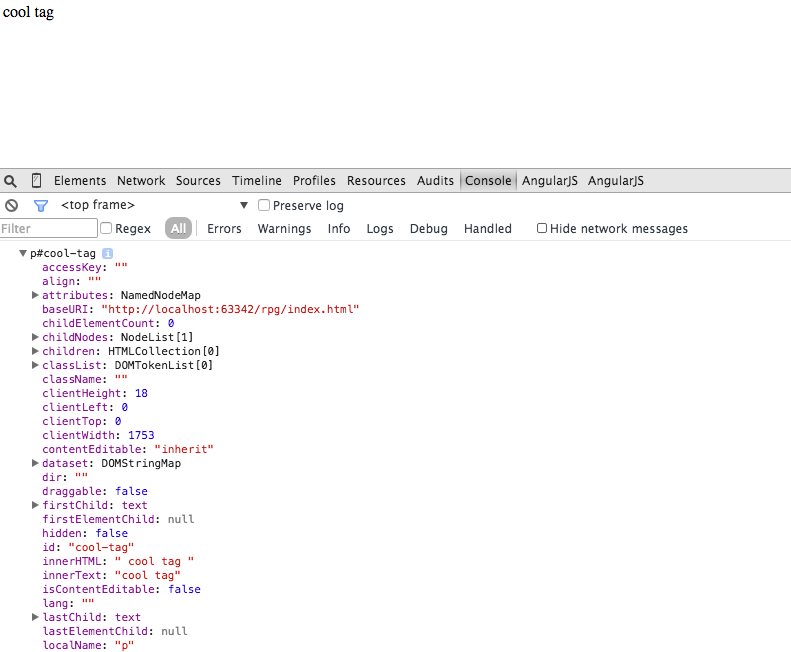
If you were to console.log(pTag), you would see that it has a lot of attributes. Lets do that:
var pTag = document.getElementById('cool-tag');
console.log(pTag);
-
Open your HTML file in a Chrome browser. If Chrome is your default browser (which it should be, if you're doing web development), just double-click the HTML file you created. Otherwise, right-click and open it with Chrome.
-
Right click in the window of the browser and choose "inspect element". This will open your dev tools. Click on the console tab, close to the right-hand side of the top bar.
- Note: if your developer tools pop up is docked to the right side of the window, you can press the "dock to bottom" button on the far right of the toolbar:

- Note: if your developer tools pop up is docked to the right side of the window, you can press the "dock to bottom" button on the far right of the toolbar:
-
Click the drop-down arrow the the left of
p#cool-tagto inspect the properties of this HTML element.

We can access any of these attributes with dot notation.
console.log(pTag.tagName);
This can be nice for debugging in the future. You are also able to reference objects that are related to the tag (firstChild, nextSibling)
jQuery
Don't get overwhelmed by thinking you'll need to learn a new language by bringing in jQuery - it's not a separate language. It's considered a JavaScript library. Think about it as a new set of tools that you can use if you want to. jQuery is a big JavaScript file that we need to reference in our HTML, just like we had to reference our own little JavaScript file earlier.
<!DOCTYPE html>
<html>
    <head>
        <link rel="stylesheet" href="styles.css">
    </head>
    <body>
        <p id='cool-tag'> cool tag </p>
        <script src="{{ reference jQuery file here }}"></script>
        <script src="app.js"></script>
    </body>
</html>
You can download jQuery from the official jQuery website's download page and reference the jQuery file which is often nested in the jQuery directory.
<script src="jquery/dist/jquery.min.js"></script>
You can also use a CDN (content delivery network), which will download jQuery directly to the browser the first time your page is loaded. Do a google search for the jQuery CDN to get the most updated version. It should instruct you to add a line to the bottom of your <body> tag that looks very much like this:
<script src="https://code.jquery.com/jquery-2.1.4.min.js"></script>
We're going to use the CDN in this example, since it is much easier than having to save jQuery to our own disk. In our HTML, we load our jQuery above our own JavaScript file so that our app.js can take advantage of it. Now to the fun stuff!!
Accessing an HTML element in jQuery
$('#cool-tag')
That's it! That's how we reference that tag! instead of:
document.getElementById('cool-tag')
we just use:
$('#cool-tag')
The "#" lets our code know we're trying to access an id. If we instead wanted to access a class, we would use a ".", just like in CSS. (E.g.: $('.some-class')
The difference between a class and an id is that an id is unique - only one object if your HTML is allowed to have any given id. If you want a bunch of different objects to behave the same and have similar attributes, they will share a class instead of an id. If there is only one element you're trying to select, you might as well give it an id.
$('.cool-tags')
This will give you an array of elements that have the class cool-tags.
<!DOCTYPE html>
<html>
    <head>
        <link rel="stylesheet" href="styles.css">
    </head>
    <body>
        <p id='cool-p-tag' class='cool-tags'> cool paragraph tag </p>
        <h1 id='cool-h1-tag' class='cool-tags'> cool h1 tag </h1>
        <h2 id='cool-h2-tag' class='cool-tags'> cool h2 tag </h2>

        <script src="https://code.jquery.com/jquery-2.1.4.min.js"></script>
        <script src="app.js"></script>
    </body>
</html>
and then in our JavaScript
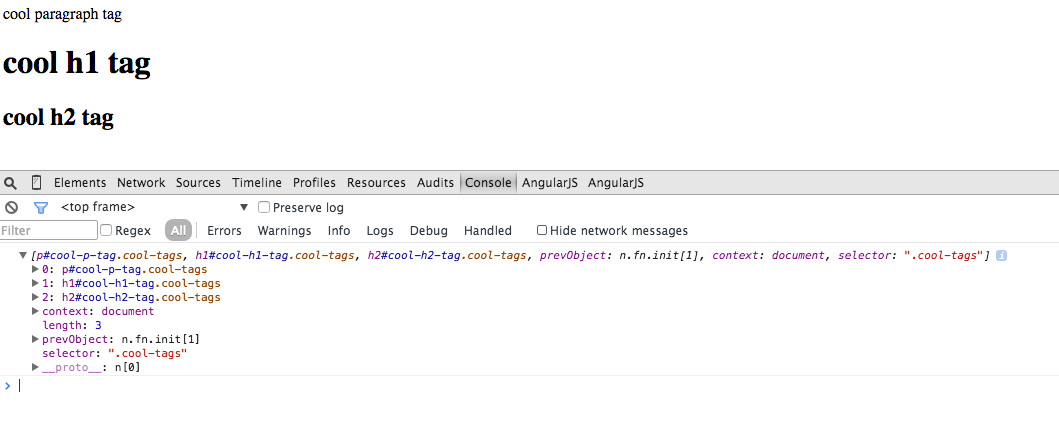
console.log($('.cool-tags'))
Our console will look like this. See the three objects in that list?

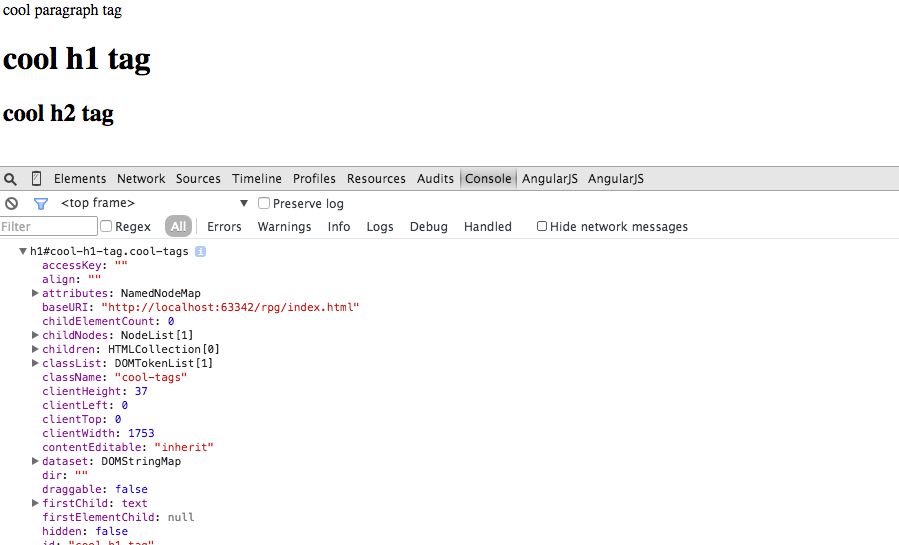
Let's try to reference the second one.
console.log($('.cool-tags')[1])

We used [1] for the second one. [0], or 'index 0', is our first one, and index 2 is our third one. It's a bit hard to think about at first, but you will get used to it.
In our code, $('.cool-tags')[1] accesses the same HTML element as $('#cool-h1-tag'). Neat, huh?
We can change attributes using JavaScript or jQuery. If you really want to use JavaScript, it's easy to google search the code, but let's utilize jQuery.
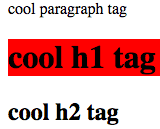
$('#cool-h1-tag').css('background-color', 'red');

Rad, but we can do that from our CSS file and have the same effect.
#cool-h1-tag {
    background-color: red;
}
The way this becomes useful is when we add event listeners. There are tons of event listeners. An event is like a click, or a keystroke, or even the mouse moving. Here is a list of them all in jQuery.
You can google the JavaScript ones too.
It looks like this.
$('#cool-h1-tag').click(function(){Things you want done})
let's change the background color to blue when we click that object
$('#cool-h1-tag').click(function(){$('#cool-h1-tag').css('background-color', 'blue')})
A cleaner version of that same code would look like this
var h1 = $('#cool-h1-tag') // selects the element with id of 'cool-h1-tag'
h1.click(function(){
    h1.css('background-color', 'blue')
})
Practice with what you have learned. Google how to hide things. Fiddle with this code in other ways.
After you get the hang of it, move on to our next tutorial that will walk you through how to create a color palette where a user can click one of a few colored boxes, then click a blank box and color that box in with the chosen color.

