Git: Core Concepts

Git is a vital tool in the toolbelt of any developer.
For example, just the other day I was able to fix a major problem I had pushed to production (totally my fault) in about 20 minutes. This would have probably taken me days to fix without Git.
For those just starting to learn dev - don’t skip learning (and actively using) Git. Yesterday I was able to fix a major problem I pushed to production in about 20 minutes that would’ve taken me days to fix manually. Thinking about writing a @freeCodeCamp blog about it soon.
— Bob Ziroll (@bobziroll) August 22, 2019
So let's spend some time to really understand the most basic of Git's features: staging and committing.
Note: this writeup doesn’t cover anything relating to GitHub, which is a third-party online web service that allows you to back up the code you’re saving with Git to the cloud. Git is local, GitHub is a cloud-based application, and they are two completely different things with a common purpose.
What is Version Control?
If you're old enough, you likely remember a world before Google Drive/Docs/Sheets where you'd have a situation like this:
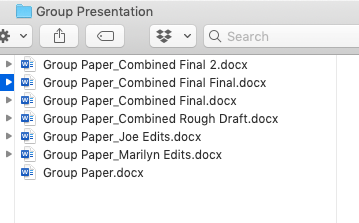
Working on a group project would lead to multiple people trying to make edits to multiple copies of an original document, which led to many duplicates. If two people made edits at the same time, someone would have to go through everything manually and combine those edits together.
There was no real way to control the different versions of the project. It was basically the Wild West. 🤠+😢
Git solves this problem 💡
Maybe you've been coding a new feature in your project, broke something that had been working just fine before, but have no idea where to find the bug or how to fix it. You've since closed the file in your editor, so using "undo" is no longer an option.
Git solves this problem 💡
Okay, but how does Git solve these problems?
The core functionality of Git is to create save points in your files. I like to think of these save points just like they are in video games - checkpoints you reach where, even if you screw everything up after that point, you can always come back and try again without having to start all over.
There are a lot of additional awesome aspects of Git, but at its core this is what it’s all about: creating save points in your code you can come back to later if you want.
How does Git work?
This core functionality of Git (creating save points in your project) works in 2 phases:
- Adding things (changed code and files) to a staging area to be committed (saved) in a timeline, and
- Actually committing (saving) those things.
Obligatory Analogy
Think of these two phases as if you were creating an old-school photo album, one where you printed photos and put them in an actual book. In case you're too young, this is what I'm talking about:
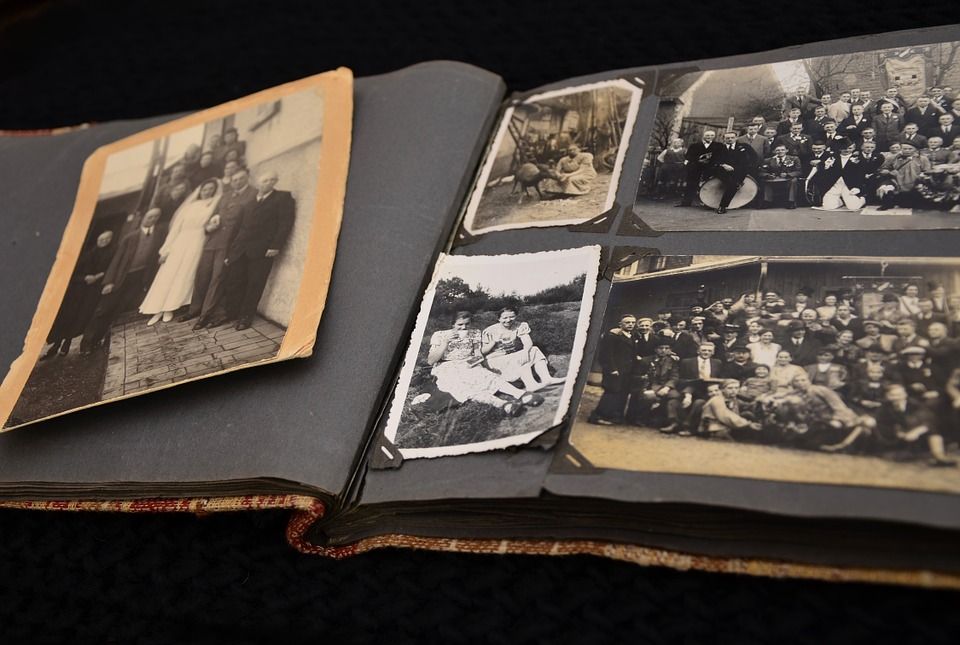
First, you take a bunch of photos with your camera. Taking a photo alone doesn't affect the photo album because you can always pick and choose which photos you want to include in the album. You can take bad photos and just re-take them if necessary.
Next, you choose which of all the photos you’ve taken you want to save in the photo album. Imagine you’ve printed them out already and you set them next to the empty page in your photo album. You’re creating a sort of “staging area” where you haven’t yet glued the photos down to the page in the photo album, but you’re preparing to do so soon.
Lastly, once you’re ready, you glue your photos down to the page and essentially cement them in time. An important part of a good photo album is including some sort of message or title that describes the events surrounding those photos.
Once you’ve done this, you can always come back to this page in your photo album and remember what things were like at that time in your life (for better or worse).
How does this relate to Git?
Let’s relate this analogy to Git.
- Taking photos is like modifying project files (writing code, creating files, or deleting files).
- Choosing the photos you want in your photo album is like adding your changes to a “staging area.”
- Gluing the photos into the photo album page is like committing (saving) your changes into a timeline of changes.
Let's break these down a bit more.
Taking the photos is like modifying your project files

Taking the photos is like making changes to your project - writing new code, adding images, deleting old files, and so forth. You’re creating the content you eventually want to save in the Git commit (“save point”). It’s still a work in progress, and you can always write, re-write, and delete anything you want without anything being "permanently" saved quite yet.
The only thing Git is doing at this point in time is watching to see if anything has changed since the last time you committed (saved) your code. If you add a line of code then delete it, Git will see that nothing overall has changed. If you write 500 lines of code across dozens of files, Git knows exactly which lines of code were added to which files and keeps track in its memory of those changes. It won’t commit anything to the timeline of changes until you tell it to, but it’s watching you closely 👀
Note: remember we're still referring to a process totally separate from saving your changes to your hard drive. Modern text editors can save your code every second or so, but that's not what we're referring to here. When I refer to "saving" with Git, I mean creating a commit that saves your changes to a timeline.
Printing/prepping the chosen photos is like adding your project changes to the “staging area”

With Git, this is the phase that happens before creating a new commit in your code. This process is called “adding to the staging area.” Adding to the staging area doesn’t create the commit, it just prepares the commit.
After adding some files to the staging area, you may realize you still have some changes to be made. No problem! Since Git hasn’t actually saved (committed) anything yet, you can simply make the new changes you want and then add those changes to the staging area too, even if those changes happen in the same file as a previously-added file. This would be like taking some new photos you decided you want to add to the photo album page and printing them.
Gluing photos into the album is like committing your code

This is the second (and final) phase to creating your “save point” (commit). There’s one major requirement when you create a commit: you must include a message. In the photo album, you can write a title or message to give some information to a future on-looker about what those photos meant to you. In Git, you write a message to describe the changes you’re saving to your code base.
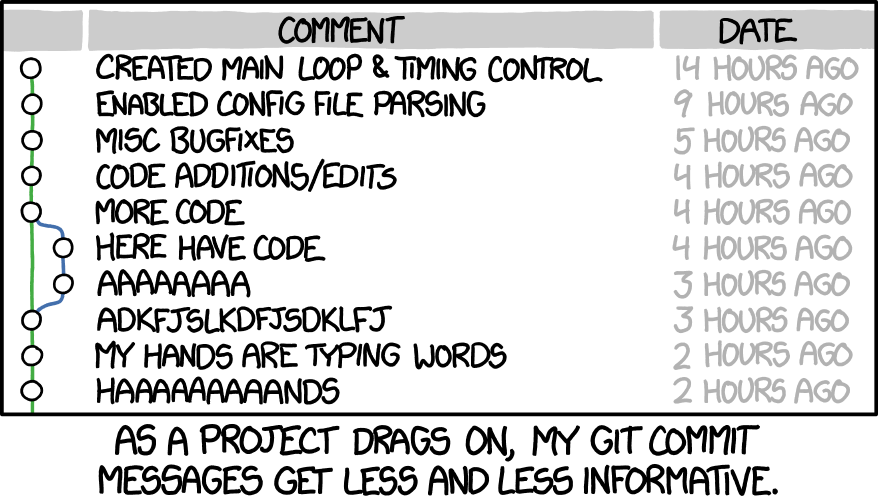
If you write a poor commit message, looking back at your code history won’t be very helpful to anyone including yourself. (What good is a message like “made some changes” if you have no idea what those changes are? Imagine finding a page in a photo album that just said “Here are some people”…) Do yourself and others a favor and always use good, descriptive commit messages that describe the feature or fix you’re adding to the code base.
Set up
Enough with the analogies, let's get moving!
Installation
First, you might already have Git installed. Open a Terminal/Command Prompt and try running git --version. If it spits out a version number, skip ahead. If it doesn’t know what you mean by git, you need to install it. Follow these instructions to do so for your operating system.
Create a Git repo
Git only knows to track projects that you’ve set up to be Git repositories. In the above analogy, we couldn’t glue photos to a photo album if we didn’t have a photo album in the first place.
When you’re ready to begin a new project, one of the first steps you should do (after creating the project folder) is to run:
git init

This allows Git to start tracking any changes you make to your project right away. Under the hood, it creates a new hidden .git folder with all the stuff inside it needs to track your changes. You’ll rarely need to go inside this folder unless you’re setting up some advanced stuff, so for now just plan on leaving it alone.
Make changes to your project
For the tutorial below, I’m going to keep things as simple as possible - a project folder that is a Git repo with a single README.md markdown file inside. If it helps, you can imagine that each change I make to the README file represents some new feature and dozens or hundreds of lines of new code. That’ll make me seem more impressive, too. 👌🏻😉
Basic Commands
git status
I like to think of this as a "sanity check" to help me know what Git believes is going on right now. (What changes it has noticed, if everything is working as it should, etc.)

It tells me I'm on the master branch (I'll be creating a separate article about branching at a later time), that I have no previous commits yet, and that I don't have anything to commit now. (Meaning, Git doesn't see anything about this folder to save at all).
Now I’ll add my README.md file and run git status again:

touch command is just a quick, easy way to create new, blank files.Git sees that I added a new file to my project! Cool. Now that this awesome new project is underway, let’s create a save point. Because, you know, it’d be hard to get back to this point from scratch!
git add
The git add command is how we put things in the staging area. Like printing the photos we took before gluing them in our photo album page. However, we need to tell Git what we want to add to the staging area. (Just entering git add will tell you that nothing was specified so nothing was added.) I'll put the filename of the file I want to add using Git:
git add README.md
git status
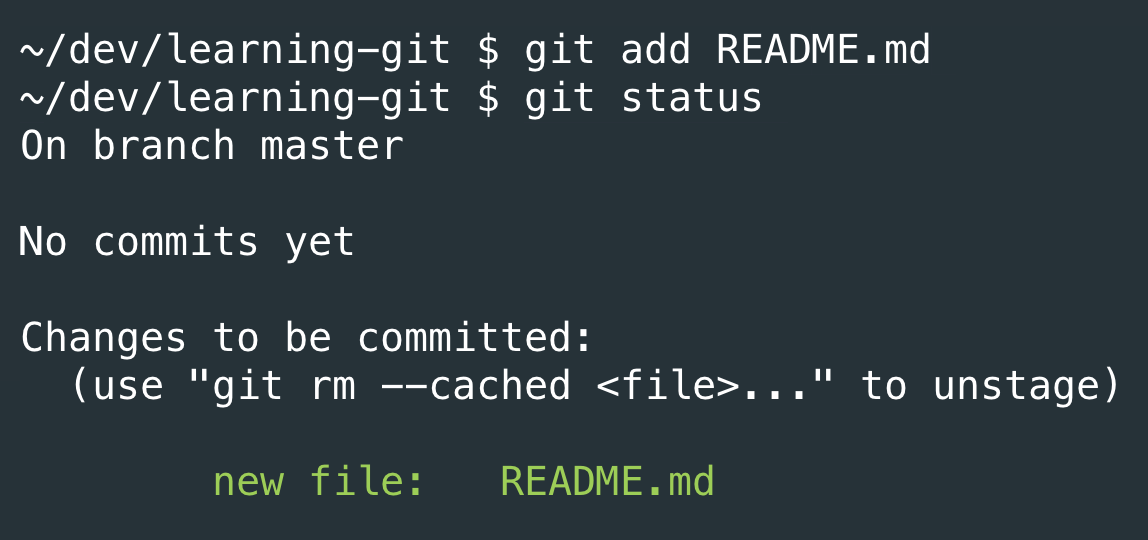
Using git status again tells us we have a new file in the staging area, but it’s turned green now! That's my easy way of knowing it has been added to the staging area.
Basically what git add README.md did was tell Git “I want to include any changes made to README.md since the last commit to be included in the upcoming commit.”
However, adding files to the staging area one at a time like this is burdensome, especially since many tasks require you to work with many files. Instead of having to remember and specify every file you’re working on, you can use a sort of “catchall” that will automatically add every file in which you’ve made changes to the staging area. My preferred way to do this is to use:
git add -A
(The -A flag says to add all the files with changes to them to the staging area).
Note: you’ll often see people usegit add .to accomplish the same goal of adding all changes to the staging area. While this works, it requires you to be in the project root directory to ensure you grab all the changes. (The.is shorthand for “the current directory”). So if youcdinto a nested directory but made changes to a file outside that directory and try to usegit add ., you’ll miss those changed files when trying to add them to the staging area.git add -A, however, works for the whole project no matter where you are currently located in the Terminal.
git commit
Once you’re ready to create a commit, you’ll do so with the git commit command. However, remember how you’re required to leave a message? If you just run git commit and hit Enter, you’ll be popped into a Terminal-based editor like Vi or Nano to fill in a message for that commit.
Instead, you can leave a message right in-line with your git commit by using the -m flag followed by a string message in quotation marks. Something like this:
git commit -m "Added some really important information to the README"
Assuming everything else was in order before you committed, you’ve now successfully committed your code with Git! Now you have a checkpoint that you can always return back to if everything goes wrong from here on.
Let's take another look at this process in the form of a gif:

Note: the gif usesgit add, but I should have usedgit add -Ato be more precise. Also, use better commit messages! Please pardon my mistakes 🙏🏻
git log
You can take a peek at your commit history by running git log. Using the arrow keys, you can scroll forward and backward in time to check commit dates, messages, and authors (the person who made the commit). Along with each of these comes a “commit hash”, which is essentially a (long) unique ID for the commit which can be used to reference it later if needed.
Time Travel
"So you keep talking about how Git can let me jump forward and backward in time… how do I actually do that?"
git checkout
The term “checkout” refers to the process of switching from one commit to another. Remember the unique ID ("hash") each commit receives? I can look back at my commit history, choose one of those unique commit hashes, and check it out with the git checkout command. If the commit I want to look at has a hash of a2 (in full they’re much longer than this - like 0c9b8f7c23dea4cf0a0285f14211124b6d5891e9), I can run:
git checkout a2
Suddenly, my whole code base will zoom back in time and everything will look like it did right after I made that commit. (This can be scary because it may look like you’ve lost all the updates since this commit, but don’t worry! They’re still around, waiting for you... in the future!)
In gif form:
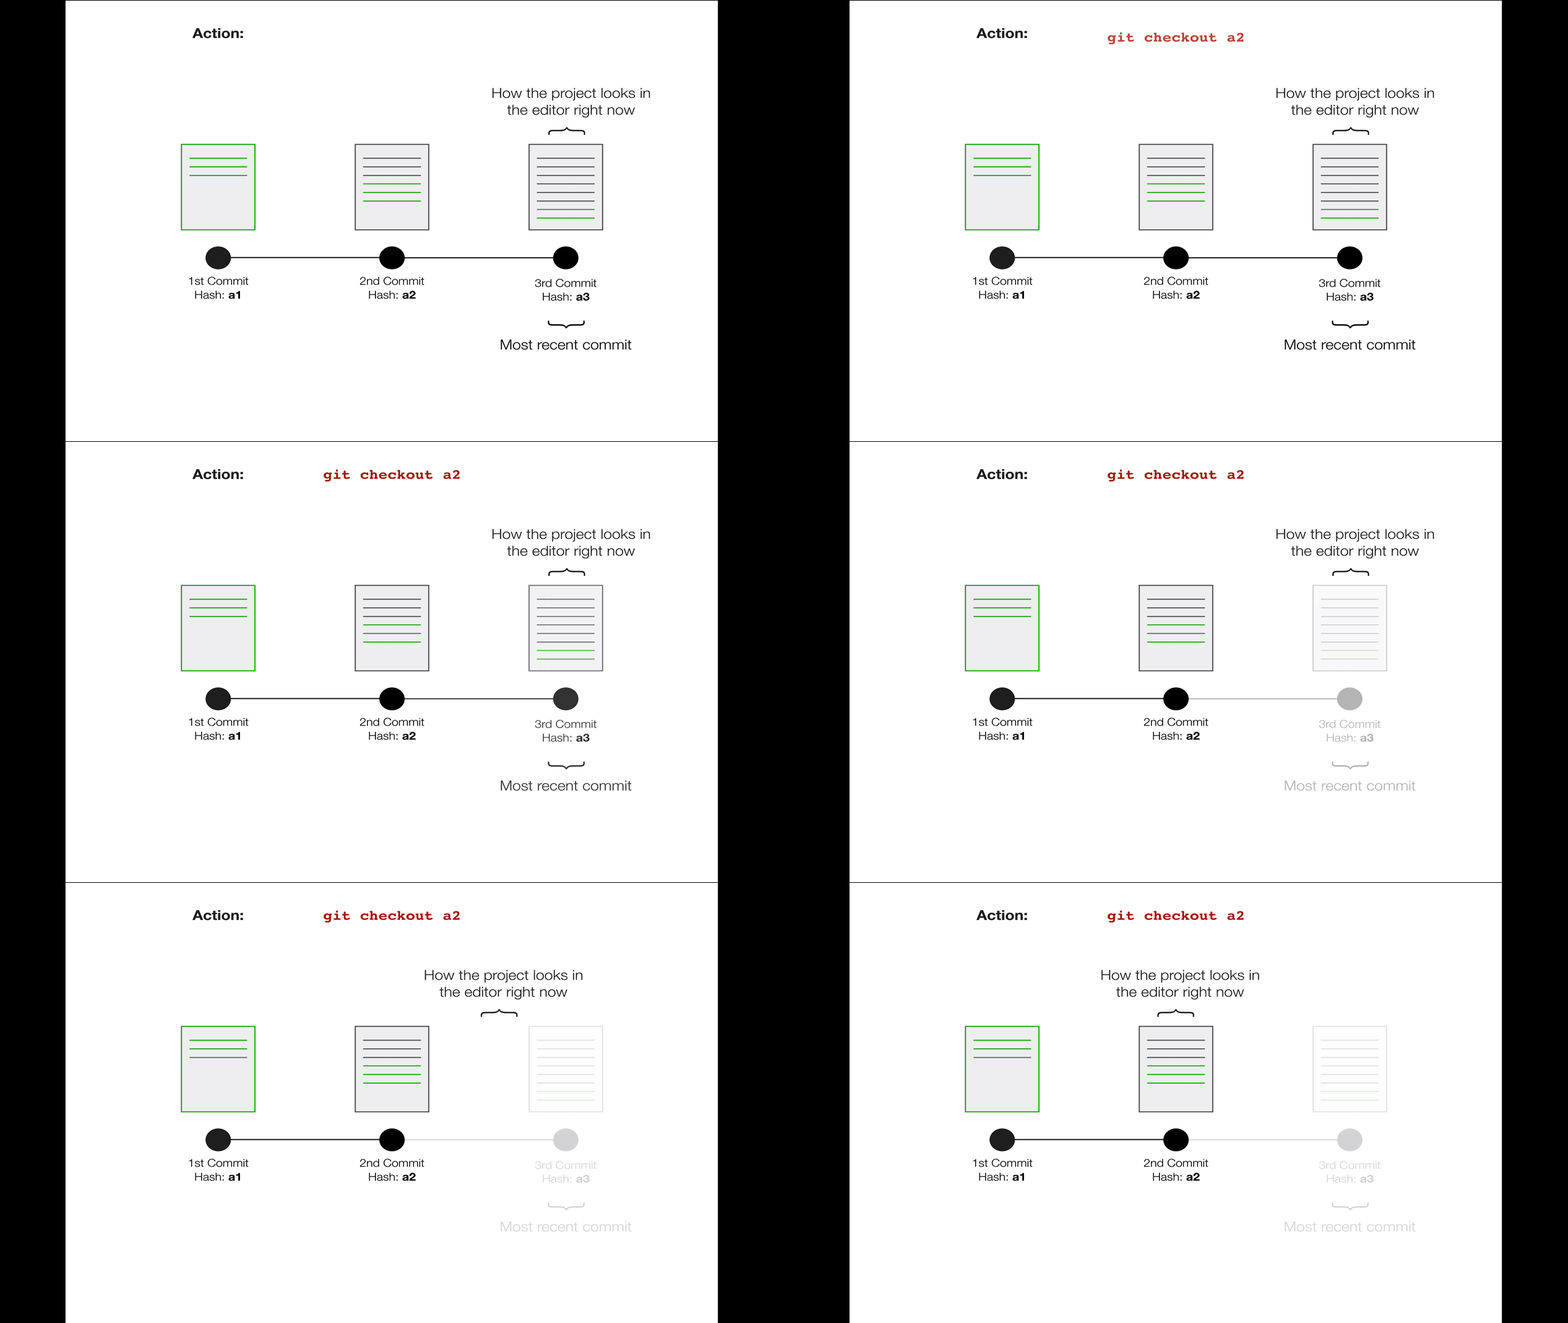
git checkout a3 or (more commonly) git checkout master to bring all your changes back.Now that you're back in time, you'll see a message from Git. Something like:
Note: checking out 'a2'.

You are in 'detached HEAD' state. You can look around, make experimental
changes and commit them, and you can discard any commits you make in this
state without impacting any branches by performing another checkout.

If you want to create a new branch to retain commits you create, you may
do so (now or later) by using -b with the checkout command again. Example:

  git checkout -b <new-branch-name>

HEAD is now at a2 Another MessageIn this state, you're no longer on the master branch, which is to say you can make experimental changes here and even create new commits, all without losing your code on the master branch (commit hash a3 in the above example).
Again, I plan on covering branching at another time, but this is just to drive home the point that Git is a really powerful tool when it comes to saving multiple versions of your code.
Conclusion
There's a million things you could learn about Git, but without understanding the core concepts, it will always be a bit of a mystery.
However, if you really want to learn and become familiar with Git, the best thing you can do is play around and experiment with it. On orientation day at V School, I always tell our new students that the easiest way to learn something new is to do it the hard way.
This means forcing yourself to do more than just read an article and hope to learn the content. So go spin up a new Git repository in an empty folder, start adding files, use git status and git log a bunch to see what things look like, and consider downloading Sourcetree by Atlassian to visualize the state of your repository while you're messing around with things.
Once you get over the learning curve with Git, you'll wonder how you ever did any development without it!
