Zoom - Getting Started

Collaborating through zoom, slack, and other digital channels is likely be a daily (if not hourly) event during your time at V School and in your career afterwards. While these tools are meant to be user friendly they also provide a lot of options and workflows that can seem confusing at first. This short article is meant to help orient you with the Zoom tools V school will be using to administer class and 1:1's.
Joining a call - Download Zoom
Whether it's the daily class call or a private 1 : 1 call, you will be sent and invite link to join a call. Once clicked, the call will open up in your Zoom app automatically. If you have not downloaded zoom you will be promted to do so when you try to join a call, or you can do it ahead of time by visiting this link: Download Zoom.
Call Interface
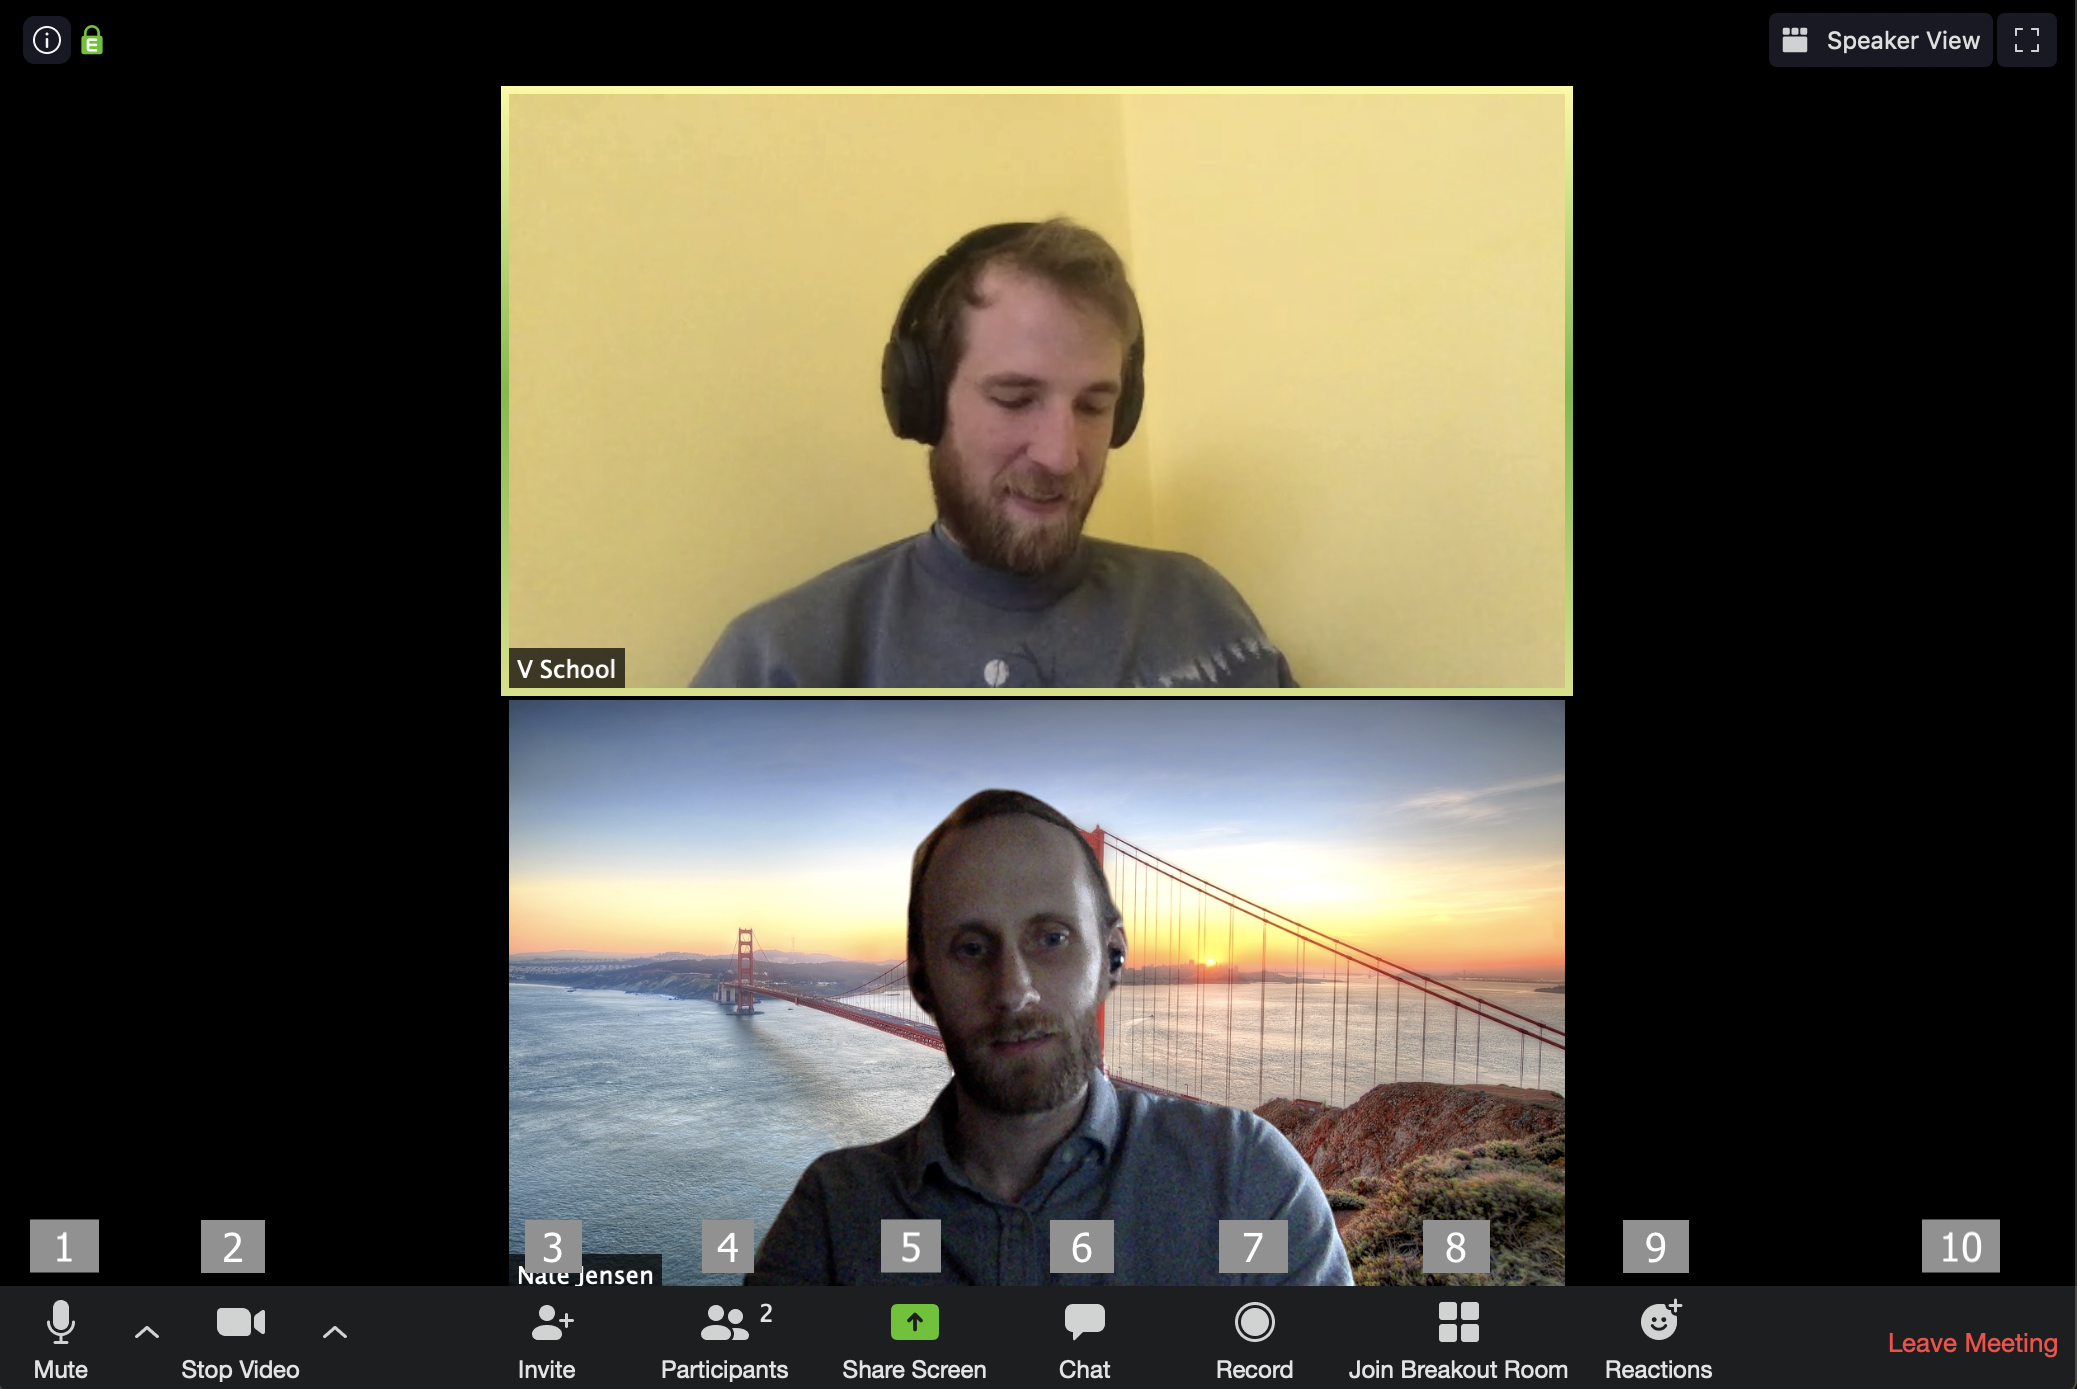
Here is an image of a standard zoom call interface.

At the top right of the screen, you will be given options for going full-screen and seeing a gallery view of all connected users/view the speaking user.
Along the bottom of the screen starting at the left we have:
1. Mute / UnMute your audio.
2. Show / Hide your video.
3. Invite (sending a link to others to join the call).
4. Participants (Who is in the call).
5. Choose which window/screen you want to share with the current participants.
- See "Sharing your Screen".
6. The Chat window for the call.
7. Click to request to record the current video.
8. Join breakout rooms (More on this below).
- See "Breakout Rooms".
9. Reactions (emojis).
10. Leave the Call.
Sharing your Screen
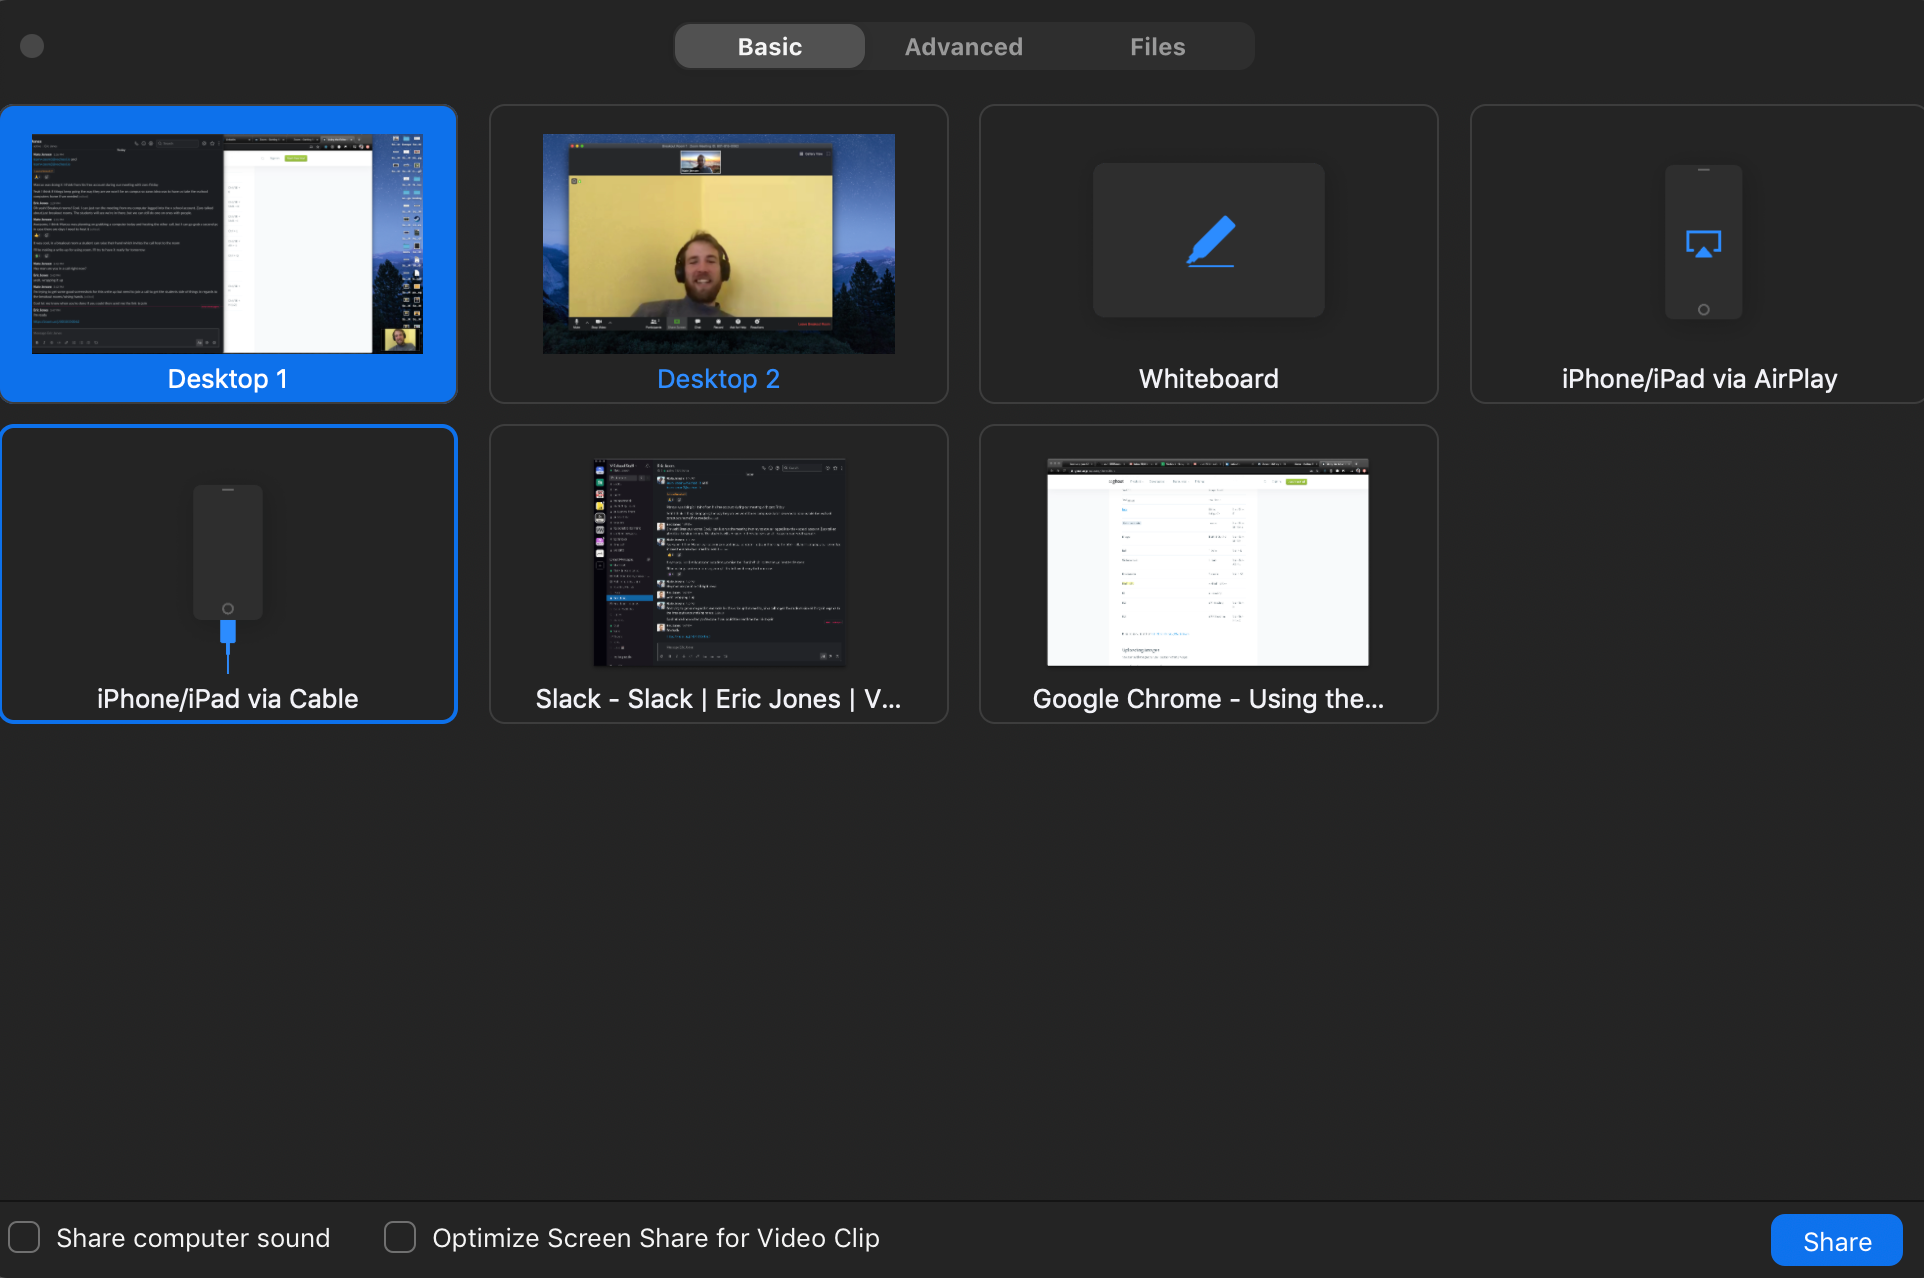
The "Share Screen" button is the green button at the bottom middle of the call's control panel. During lessons the instructor in the call will be sharing their screen, but at times you will need to share your screen to get help on a problem you're working on. When you click "Share Screen" you are presented with a few options in a window that looks like this.

First select a window you would like to share, then click the "Share" button the bottom right. Typically it is best to share "Desktop 1" or "Desktop 2" so that you can move between code and web browser windows without having to re-share a different screen.
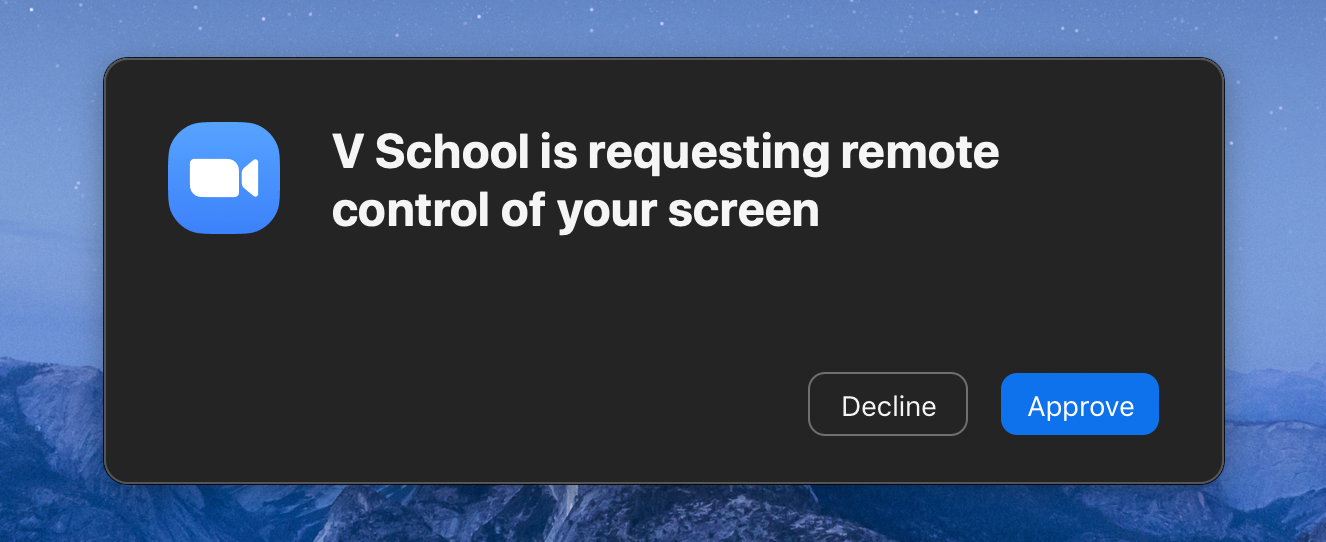
Sometimes an instructor will ask to take remote control of your screen to help with a problem. When that happens, you will receive an invite that looks like this.

Once you click "Approve", both the call admin and you will have access to control your shared screen until you stop sharing your screen.
Breakout Rooms
While everyone that joins the call will be in the same initial "Main Room", the call administrator is able to make multiple "Breakout Rooms" where small sub groups can be sent without leaving the main call.
NOTE: You will not have access to join any breakout rooms until the call admin has created them.
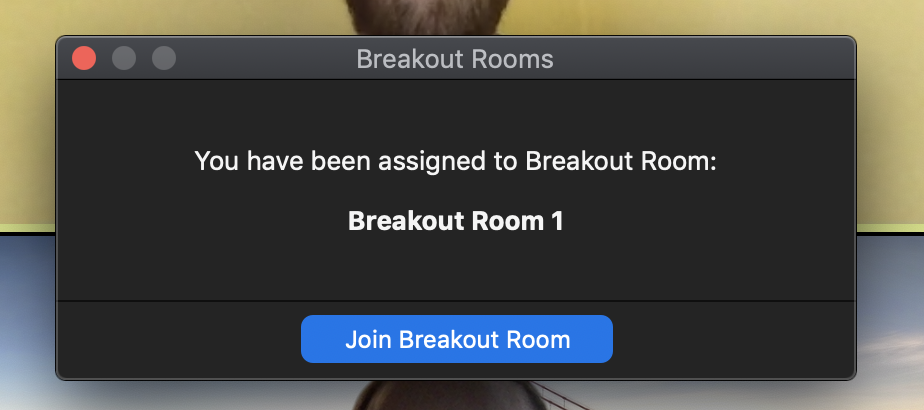
Once rooms have been created, a tab in the call's bottom control panel will say "Breakout Room" (See #8 in the Screen layout image). If you click into that window, this sub window will pop up:

Once you click Join Breakout Room, the current call you are in will close and shortly after a new window will open in the breakout room. Not much changes when you are in a breakout room, but there are two important things to note.
1. You can "Ask for Help", this invites the call admin (instructor) into the breakout room.
2. You can return back to the main call by clicking "Leave Breakout Room".

Wrapping Up
That is all you need to know to be up and running with how V School will be using Zoom. New breakout rooms can be created as requested by students in the call, but by default at least 2 breakout rooms will exist to account for modules 0 - 2 and modules 3 - 6.

