Token Auth with JWTs Part 5 - Forgotten password

Sometimes you forget passwords. It's inevitable, especially if you're not using a good password manager. We need to allow our users to reset their passwords if they forget them. In part 4, we added the ability for a logged-in user to change their password, which was easy enough for us because we could verify that they were authorized to do so - they had already logged-in!
However, with a forgotten password, we need another way to verify that the person using the password reset feature is allowed to do so on the specified account. If I could just provide a username and new password to reset it, then anyone who knew my username could simply change the password to something they know and get access to all my data.
The most common way to accomplish a password reset is via email - the user clicks the "Forgot Password" link, it sends them to a page where they input their email address, and if a user with that email address is found in the database, it generates a unique link the user can click on from their email that will allow them to set a new password.
This is going to be a big feature we're adding, so make sure you're all caught up on the previous 4 posts that have led up to this point. If you just want to download the code to make sure everything else is working correctly, you can get the zip file here.
Checklist of things to do:
Let's plan out the things we'll need to do ahead of time so we can get an idea of what's ahead of us:
- Add an email property to our user, and make it required.
- Add a link to our login page for if the user forgot their password
- That link should open a new page that has an input for the user's email address
- Add a server endpoint for forgotten passwords that the above input reaches out to.
- If the email isn't found in the database, send that message back to the client so the user can know.
- If it is, generate a link the user can click on that takes them to a page for resetting their password
- Send an email to the user with that link. Make the link valid for only a certain amount of time (1 hour).
We may find ourselves adding to this list as we go on, but for now let's take care of some of the easier tasks.
Add properties to our users schema:
We can even use some of mongoose's built-in validation (required, unique) and our own regular express to validate that an email is completely valid. Our purpose in doing so is to try to avoid the user inputting an invalid email when they sign up or putting in an email that's already registered in the system. We can even add our own string matching regular expression and a custom error message to make sure they're typing in a valid email address instead of just a random string of characters.
Of course the best way to check that a user's email is valid is by forcing them to check their email in order to activate their new account. That's something to keep in mind, but for now this will do.
We also need to have a way to store some extra properties in case the user needs to reset their password. In the end, our user schema will look like this:
// models/user.js

var userSchema = new Schema({
    name: String,
    username: {
        type: String,
        required: true,
        unique: true,
        lowercase: true
    },
    email: {
        type: String,
        required: true,
        unique: true,
        lowercase: true,
        match: [/^\w+([\.-]?\w+)*@\w+([\.-]?\w+)*(\.\w{2,10})+$/, 'Please fill a valid email address']
    },
    password: {
        type: String,
        required: true
    },
    admin: {
        type: Boolean,
        default: false
    },
    resetPasswordToken: String,
    resetPasswordExpires: Date
});
Add a forgot password link and form
We need an "entry point" for our users who have forgotten their passwords. Typically you'll find a link to the forgotten password form on the login page, since that's usually when the user will realize they don't remember their password. Let's start with that:
<!-- login.html -->
...
<div class="form-group">
    <label for="password">Password</label>
    <input type="password" id="password" class="form-control" ng-model="user.password">
    <a href="#/forgot" class="small">Forgot Password?</a>
</div>
Now that we're trying to send the person to /forgot, we should add a .when to our app.config inside of auth.js:
.when("/forgot", {
    templateUrl: "components/auth/forgot/forgot.html",
    controller: "ForgotPasswordController"
})
We'll also need to create the associated html and js files referenced above (auth/forgot/forgot.html and auth/forgot/forgot.js) as well as link the js file in our index.html.
index.html
<script src="components/auth/forgot/forgot.js"></script>
forgot.html
<div class="row">
    <div class="col-md-4 col-md-offset-4">
        <h3>Email Password Reset</h3>
        <p>In order to verify your identity and reset your password, please provide the email you used when you originally signed up with the Todo App.</p>
        <form>
            <div class="form-group">
                <label for="email">Email Address</label>
                <input type="email" id="email" class="form-control" ng-model="email" autofocus>
            </div>

            <button class="center-block btn btn-primary btn-lg" ng-click="forgotPassword(email)">Reset Password</button>
        </form>
    </div>
</div>
forgot.js
angular.module("TodoApp.Auth");

.controller("ForgotPasswordController", ["$scope", "UserService", function ($scope, UserService) {
    $scope.forgotPassword = function(email) {
        UserService.forgotPassword(email).then(function(response) {
            alert(response.data.message);
        }, function (response) {
            alert(response.data.message);
        });
    };
}]);
Above we're calling the "forgotPassword" method of the UserService, which isn't yet written, so let's write it:
auth.js (inside of the UserService)
this.forgotPassword = function (email) {
    console.log("Sending an email to " + email);
    return $http.post("/auth/forgot", {email: email})
};
Our service will be calling out to a new endpoint on our server at /auth/forgot. That endpoint doesn't exist yet, so we'll need to write it.
Sign up for the SendGrid service
SendGrid is an online service with a robust API and set of developer tools for simplifying the email-sending process. One popular package for creating your own email service right inside of node is called nodemailer, but since setting up an email server is outside the scope of this tutorial, we'll just make use of SendGrid's free email sending platform (up to 40,000 emails per month once you've verified your email address) instead.
Head to SendGrid's signup page and create a new account. When it asks how you'll be using their service, choose the option for their API:

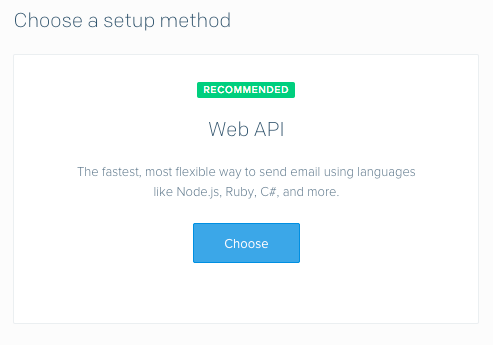
Choose Node.js as your backend:

Enter a name for your API Key:

After clicking "Create Key", add your API key (everything highlighted in yellow)...

to your config.js file:
module.exports = {
    database: "mongodb://localhost/todos",
    secret: "elephant monkey teeth",
    sendgridApiKey: "YOUR-SENDGRID-API-KEY-HERE"
};
You don't need to run the commands they've listed in their 3-step process.
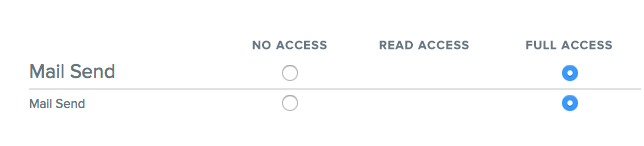
Now head to the API keys section to change the permissions on the API key. The only one we need to worry about changing right now are the "Mail Send" settings, which should be set to "Full Access":
Install npm packages
In terminal, run:
npm install --save sendgrid crypto async
sendgridis the npm package built by the sendgrid team for integrating with their API.cryptowill help us generate a random string to use as the token in our user object and the link we send to their email.asyncjust helps us make our code organized a little nicer and avoid tons of nested callbacks. It isn't strictly necessary.
Set up the /forgot endpoint in the authRoutes.js
Check the comments in the code below for an explanation of each part.
authRoutes.js
// Don't forget to require the new packages
var async = require("async");
var crypto = require("crypto");

...

authRoutes.post("/forgot", function (req, res, next) {
    /*
    * async.waterfall takes an array of functions to run one after the other. The last parameter to each of these
    * functions should be a callback function that you'll execute when you're ready to move to the next function in the
    * array. Whatever parameters you pass to this callback function (which we've called `done`) are the parameters that
    * will be passed to the next function in the array (assuming no errors).
    * */
    async.waterfall([
        function (done) {
            crypto.randomBytes(20, function (err, buf) {
                if (err) return done(err);
                var token = buf.toString("hex");

                // Pass `null` for the "error" and the token to the next function in the array
                done(null, token);
            });
        },
        // Received the token from the previous function
        function (token, done) {

            // Find the user by their email address provided in the req.body
            User.findOne({email: req.body.email}, function (err, user) {
                if (err) return res.send(err);

                // If they submitted an email that doesn't belong to any users in the database:
                else if (!user) return res.status(404).send({
                    success: false,
                    message: "The email " + req.body.email + " isn't registered in the system"
                });

                // Set the password reset token on the user object and give them 1 hour to click the link we'll send
                user.resetPasswordToken = token;
                user.resetPasswordExpires = Date.now() + 3600000;  // 1 hour
                user.save(function (err) {

                    // pass the token and the user object to the next function in the array
                    done(err, token, user);
                });
            });
        },
        function (token, user, done) {

            // Create a new email using the sendgrid npm package
            var helper = require("sendgrid").mail;

            // Who you want this email to be "coming from". This doesn't have to be a real email address.
            var fromEmail = new helper.Email("noreply@todosapp.io");

            // Send the email to the address provided by the user trying to reset their password
            var toEmail = new helper.Email(user.email);

            // Email subject line
            var subject = "Your TodoApp password reset link is here";

            // Actual content of the email. You can make this look pretty by using text/html instead of text/plain
            var content = new helper.Content("text/plain", 'You are receiving this because you (or someone else) ' +
                'have requested the reset of the password for your account.\n\n' +
                'Please click on the following link, or paste this into your browser to complete the process:\n\n' +
                'http://' + req.headers.host + '/#/reset/' + token + '\n\n' +
                'If you did not request this, please ignore this email and your password will remain unchanged.\n');

            // Put all those pieces together to make an email object
            var mail = new helper.Mail(fromEmail, subject, toEmail, content);

            // Prove you're allowed to use sendgrid by providing your API key
            var sendgrid = require("sendgrid")(config.sendgridApiKey);

            // Create a request object
            var request = sendgrid.emptyRequest({
                method: 'POST',
                path: '/v3/mail/send',
                body: mail.toJSON()
            });

            // Send the request to the sendgrid API, which will send the email for you!
            sendgrid.API(request, function (err, response) {
                if (err) return res.status(500).send(err);
                done(null, "done");
            });
        }

        // This last function (outside the array of functions) is called regardless what happens. If there is an error
        // at any point in the array of functions, it'll skip the remaining functions in the array and call this one
        // instead. If there are no errors, this will get called last, but with `null` for the `err` parameter.
    ], function (err, result) {
        if (err) return res.status(500).send(err);

        // Send a response back to the frontend.
        res.status(202).send({success: true, message: "Mail sent successfully!"});
    })
});
In the first callback function in the array, we're simply creating a random set of characters to act as the unique reset token for our user to reset his/her password. We use the crypto npm package to do this, using the randomBytes method.
In the second callback function in the array, we use the email that was passed in the body of the request to find the user in the database (if one exists) so we can set that user's resetPasswordToken to the token we just generated, as well as give it an expiration of 1 hour from the time this request was sent in.
In the third callback function in the array, we use the sendgrid npm package to create and send an email.
The third callback function is the most complex, and it adapted from the example file that SendGrid uses on their Github page. There are tons of options for you to use when sending emails with their API, so be sure to check out their examples and their documentation.
You can see inside the content variable in the third callback function, we create the body of our email with the link to where the person can visit to reset their password. When they click on that link, it will try to open that view in the Angular application, which we haven't written in yet. So let's do that!
auth.js
...
.when("/reset/:resetToken", {
    templateUrl: "components/auth/reset/reset.html",
    controller: "PasswordResetController"
})
Create the reset folder with reset.html and reset.js inside
Don't forget to link reset.js in index.html!
reset.html
<div class="row">
    <div class="col-md-4 col-md-offset-4">
        <h3>Email Password Reset</h3>
        <p>In order to verify your identity and reset your password, please provide the email you used when you originally signed up with the Todo App.</p>
        <form>
            <div class="form-group">
                <label for="newPassword">New Password</label>
                <input type="password" id="newPassword" class="form-control" ng-model="password" autofocus>
            </div>

            <div class="form-group">
                <label for="newPasswordRepeat">Repeat Password</label>
                <input type="password" id="newPasswordRepeat" class="form-control" ng-model="passwordRepeat">
            </div>

            <button class="center-block btn btn-primary btn-lg" ng-click="resetForgottenPassword(password, passwordRepeat)" ng-disabled="password !== passwordRepeat">Reset Password</button>
        </form>
    </div>
</div>
reset.js
var app = angular.module("TodoApp.Auth");

app.controller("PasswordResetController", ["$scope", "$location", "$routeParams", "UserService", function ($scope, $location, $routeParams, UserService) {
    $scope.resetForgottenPassword = function(password, passwordRepeat) {
        if (password === passwordRepeat) {
            UserService.resetForgottenPassword(password, $routeParams.resetToken).then(function(message) {
                alert(message);
                $location.path("/login");
            });
        }
    };
}]);
Once again, this references UserService.resetForgottenPassword, which doesn't yet exist, so let's create it:
Add to UserService in auth.js:
...
this.resetForgottenPassword = function(password, resetToken) {
    return $http.post("/auth/reset/" + resetToken, {password: password}).then(function (response) {
        return response.data.message;
    });
};
...
This calls out to the /auth/reset/<someResetToken>, which isn't in our code yet, so let's jump to the backend and write that:
authRoutes.js
...
authRoutes.post("/reset/:resetToken", function (req, res) {
    User.findOne({resetPasswordToken: req.params.resetToken}, function (err, user) {
        if (err) {
            res.status(500).send(err);
        } else {
            user.password = req.body.password || user.password;
            user.resetPasswordToken = undefined;
            user.resetPasswordExpires = undefined;

            user.save(function (err, user) {
                res.send({success: true, message: "Password successfully reset!"});
            });
        }
    });
});
...
This pulls out the resetToken that was added to the URL parameter, searches for a user who has that reset token, then changes his/her password based on the password that was entered in the body of the request from the form in our reset.html page.
Testing it out
At this point you should be able to test this out! As a recap, the process should run something like this:
- The user clicks the "Forgot Password?" link on the login page
- The user enters in the email address they used when creating an account
- You'll want to make sure to go back to the signup form and add a link for the user to add his/her email
- You'll also want to make sure to add an email property to any existing users you have in your database, or create a new test user in order to create a user in the database who has an email. (Must be a valid email address that you can actually check when you're testing this new password reset feature out!).
- The system creates a random token using the
cryptopackage, tries to find a user with the specified email address in the database and assigns the token to that user, then sends the user an email with a link (including that unique token in the url) to the user's email address. - The user clicks on the link, which opens a page allowing them to choose a new password.
- The new password is sent to the server with the reset token in the url.
- The server looks up a user in the database with the specified reset token and changes his/her password to the new password provided by the user.
- Upon successful password change, the user is sent to the login page, where they can then log in with their new password!
Conclusion
Congratulations! You've just implemented a very important feature to your app. If one of your users ever forgets his/her password, they won't just be out of luck anymore!