Intro to Webpack

It's fairly standard practice these days when building a website to have some sort of build process in place to help carry out development tasks and prepare your files for a live environment.
You may use task runners like Grunt or Gulp for this. These create a chain of steps or transformations that allow you to throw your code in one end and get some minified CSS and JavaScript out at the other.
These tools are extremely popular and very useful. There is, however, another way of doing things, and that way is to use Webpack.
What Is Webpack?
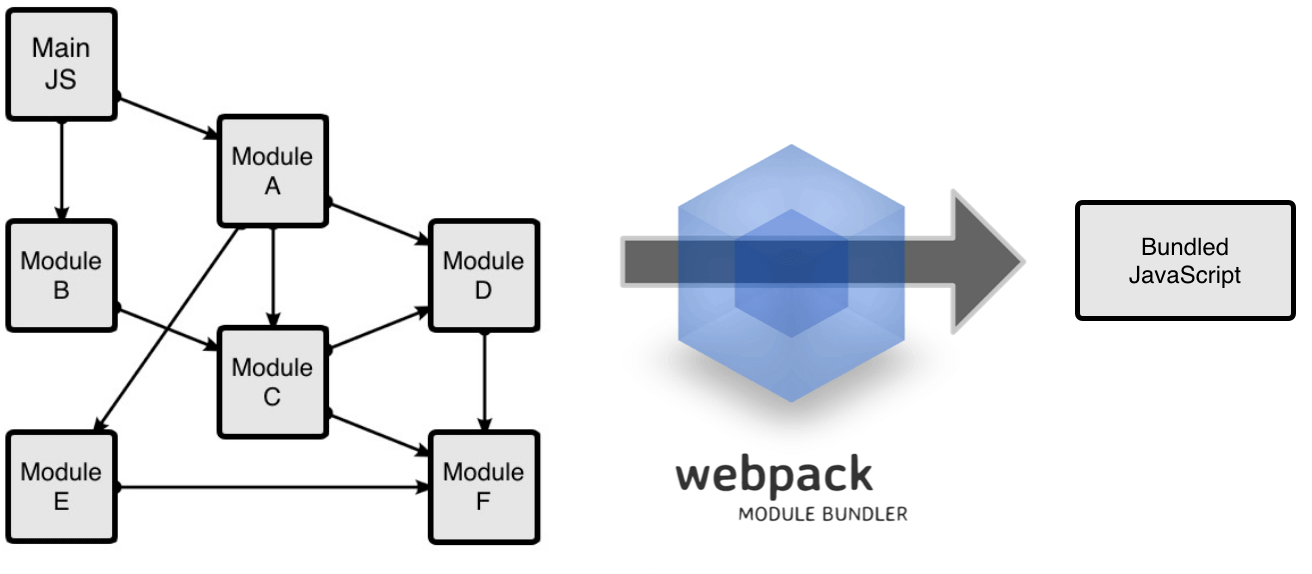
Webpack is what is known as a "module bundler". It takes JavaScript modules (as in module.exports=whatevs; & var whatevs = require('./whatevs'), understands their dependencies, and then concatenates them together in the most efficient way possible, and outputs a single JS file at the end. It can also do transformations like Gulp and Grunt as well by using things called loaders.
Webpack isn't restricted to JavaScript files. By using Loaders, Webpack understands that a JavaScript module may require a CSS file, and that CSS file may require an image. The outputted assets will only contain exactly what is needed with minimum fuss. Webpack finds your files' dependencies, their dependencies, and so forth, and then puts it all together.
Installation
Install Webpack globally on your machine by running the command npm install webpack -g. This will enable you to run Webpack from anywhere on your system.
Next, make a new folder and create a basic HTML file like so:
<!doctype html>
<html>
    <head>
        <meta charset="utf-8">
        <title>Webpack fun</title>
    </head>
    <body>
        <h2></h2>
        <script src="bundle.js"></script>
    </body>
</html>
The important part here is the reference to bundle.js, which is what Webpack will be making for us. Also note the H2 element—we'll be using that later.
Next, create two files in the same directory as your HTML file. Name the first main.js, which as you can imagine is the main entry point for our script. Then name the second say-hello.js. This is going to be a simple module that takes a person's name and DOM element, and inserts a welcome message into said element.
// say-hello.js

module.exports = function (name, element) {
    element.textContent = 'Hello ' + name + '!';
};
Now that we have a simple module, we can require this in and call it from main.js. This is as easy as doing:
var sayHello = require('./say-hello');

sayHello('Tanner', document.querySelector('h2'));
Now if we were to open our HTML file then this message would obviously not be shown as we've not included main.js nor compiled the dependencies for the browser. What we need to do is get Webpack to look at main.js and see if it has any dependencies. If it does, it should compile them together and create a bundle.js file we can use in the browser.
Head back to the terminal to run Webpack. Simply run: webpack main.js bundle.js
The first file specified is the entry file we want Webpack to start looking for dependencies in. It will work out if any required files require any other files and will keep doing this until it has found all the necessary dependencies and linked them up properly. Once done, it outputs the dependencies as a single concatenated file to bundle.js. If you press return, you should see something like this:
Hash: 3d7d7339a68244b03c68
Version: webpack 1.12.12
Time: 55ms
    Asset     Size  Chunks             Chunk Names
bundle.js  1.65 kB       0  [emitted]  main
   [0] ./main.js 90 bytes {0} [built]
   [1] ./say-hello.js 94 bytes {0} [built]
Now open index.html in your browser to see your page saying hello!
Configuration
It isn't much fun specifying our input and output files each time we run Webpack. Thankfully, Webpack allows us to use a config file to save us the trouble. Create a file called webpack.config.js in the root of your project with the following contents:
module.exports = {
    entry: './main.js',
    output: {
        filename: 'bundle.js'
    }
};
Now we can type just webpack and nothing else to achieve the same results.
Webpack Dev Server
Webpack has its own development server that will rebuild and re-transpile when changes are made. Set up a Webpack development server but running npm install webpack-dev-server -g
Then simple run the command webpack-dev-server. This will start a simple web server running based off of your webpack.config.js file in the current folder. Open a new browser window and visit http://localhost:8080/webpack-dev-server/. You should see the same output as before.
Loaders
One of the most important features of Webpack is Loaders. Loaders are analogous to "tasks" in Grunt and Gulp. They take files and transform them in some way before they are included in our bundled code.
Say we wanted to use some of the cool es6 (ES2015) features in our code. es6 is a new version of JavaScript that isn't supported in all browsers, so we need to use a loader to transform our es6 code into plain old ES5 code that is supported by the browser. To do this, we use the Babel Loader. Install Babel, the Babel loader, and a preset by running:
npm install babel-loader babel-core babel-preset-es2015 --save-dev
This installs Babel, the Babel Loader, the es6 preset which tells Babel what type of JavaScript it is converting to, and all of their dependencies.
Now that the loader is installed, we just need to tell Babel to use it. Update webpack.config.js so it looks like this:
module.exports = {
    entry: './main.js',
    output: {
        filename: 'bundle.js'
    },
    module: {
        loaders: [
            {
                test: /\.js$/,
                exclude: /node_modules/,
                loader: 'babel',
                query: {
                    presets: ['es2015']
                }
            }
        ],
    }
};
There are a few important things to note here.
- The first is the line test: /.js$/, is a regular expression telling us to apply this loader to all files with a .js extension.
- Similarly exclude: /node_modules/ tells Webpack to ignore the node_modules directory. loader and query tell webpack which loader and preset to use...in this case, the Babel loader with the ES2015 preset.
Restart your web server by pressing ctrl+c to kill the server and running webpack-dev-server again. All we need to do now is use some ES6 code in order to test the transform. How about we change our sayHello variable to be a constant?
// say-hello.js
const sayHello = require('./say-hello')
If you still have the webpack dev server running, Webpack should automatically re-transpile your code and refresh your browser. Hopefully you'll see no change whatsoever. Take a peek in bundle.js and see if you can find the const keyword. If Webpack and Babel have done their jobs, you won't see it anywhere—just plain old JavaScript.